Recently we came across an issue where the cloud proxies in our VROPS version 8.18.3 showed their health as outdated health status.
Issue: VROPS Proxies (in two different vcenters) are showing as outdated health status
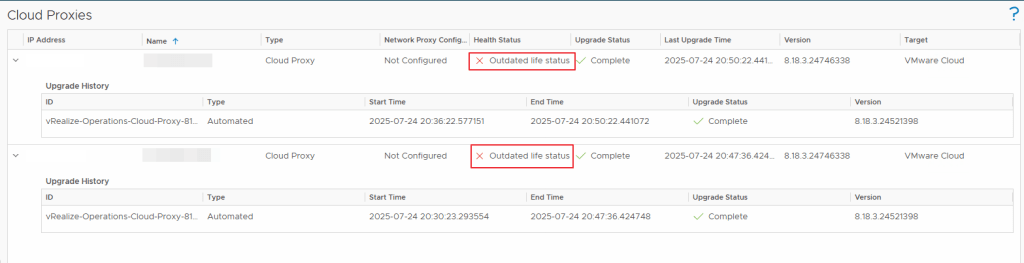
NOTE: Certain IP addresses and Names have been removed/blurred to protect the environment details in this blog post.
Investigation:
Upon investigating the issue, we found that these proxies started having issues after we renewed the certificate for VROPS Primary, Secondary & Data Nodes in our main vcenter using VRSLCM which went fine. But, it failed to push the renewed certificate to the cloud proxies.
We have also confirmed the same using the below logs —
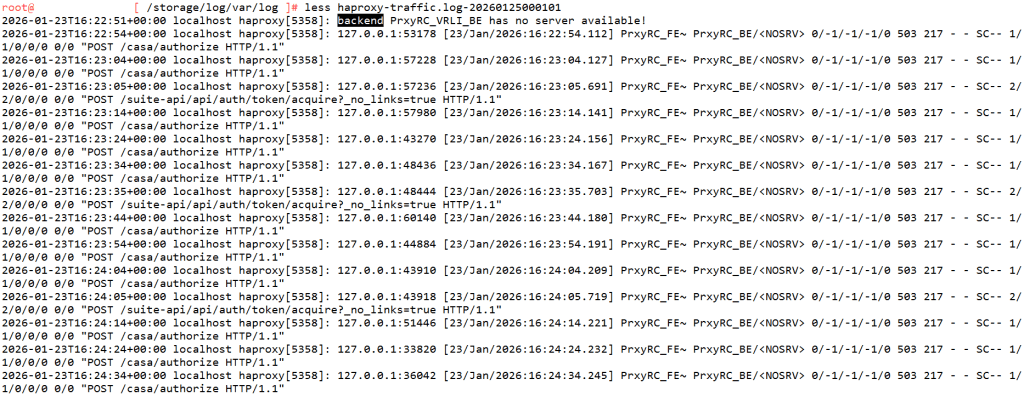
Check the haproxy-traffic.log at the location /storage/log/var/log on the Cloud Proxy VM after you SSH into it as root
There is an KB Article for this particular behavior – Cloud proxy appears offline or shows an outdated life status in Aria Operations UI after a cluster upgrade
Solution:
There are Two ways to resolve this issue
- To follow the above kb article
- to redeploy the cloud proxy servers so that they get the renewed certificate from the Primary, Secondary & Data nodes (VROPS)
I picked the Second (2) Solution for my issue where in I re-deployed the two vrops proxy vms in my environment to get them up and running and their health is now Green.
Hope this article helps!