Install and Configure vRealize Suite Life Cycle Manager 1.2

This post details the installation and configuration of the vRealize Suite Life Cycle Manager 1.2 which was recently released by VMware to automatically provision vRA components as part of their Cloud initiative.

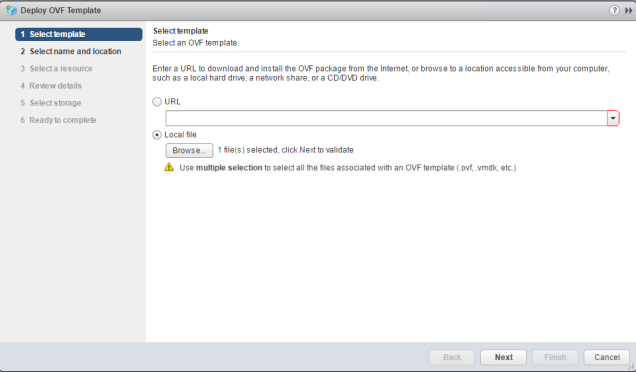
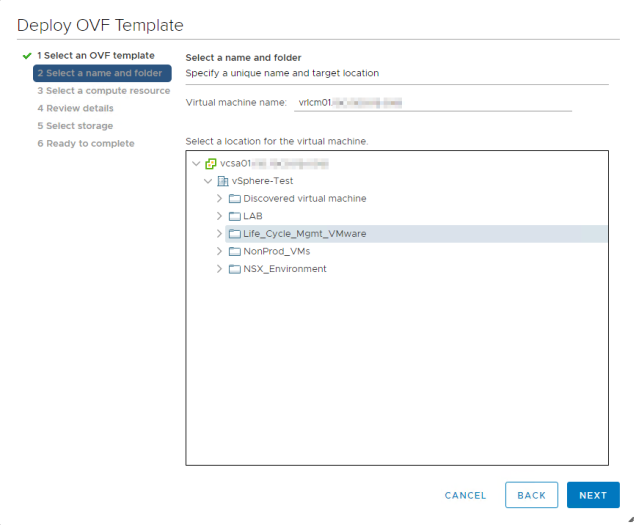
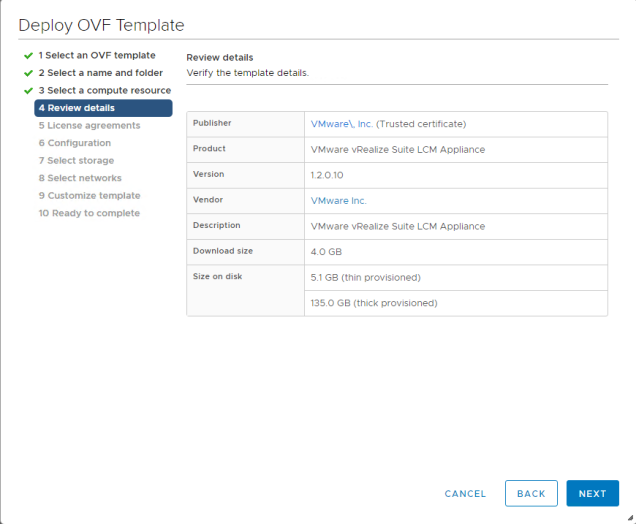
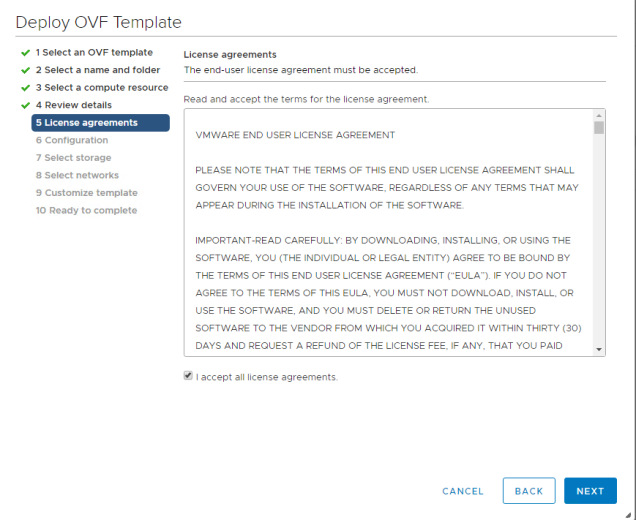
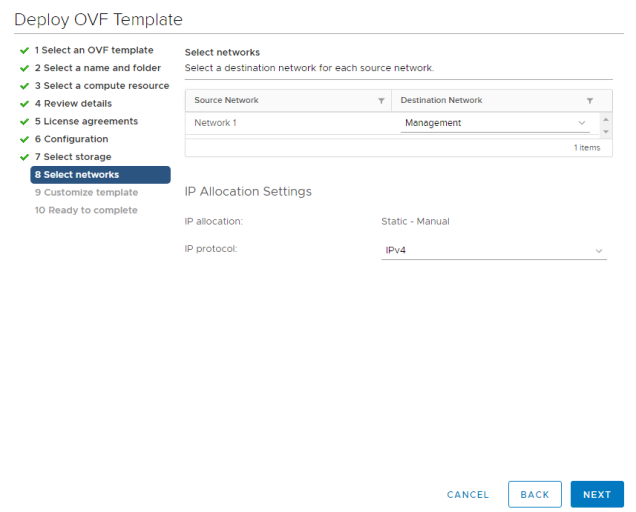
First, Download the Life Cycle Manager ova from the vRealize Suite 2017 components and deploy it using the vCenter web client

vRLCM_Installation01

vRLCM_Installation02

vRLCM_Installation03

vRLCM_Installation04

vRLCM_Installation05

vRLCM_Installation06
Select Enable Content Management option to enable content management.

vRLCM_Installation07

vRLCM_Installation08

vRLCM_Installation09
Provide the Hostname, default gateway, network IP address, subnet mask, DNS servers and the domain names in this window and click Next to finalize the deployment of the appliance.
vRLCM_Installation10
Click Finish to finalize the settings and to deploy the Life Cycle Manager Appliance

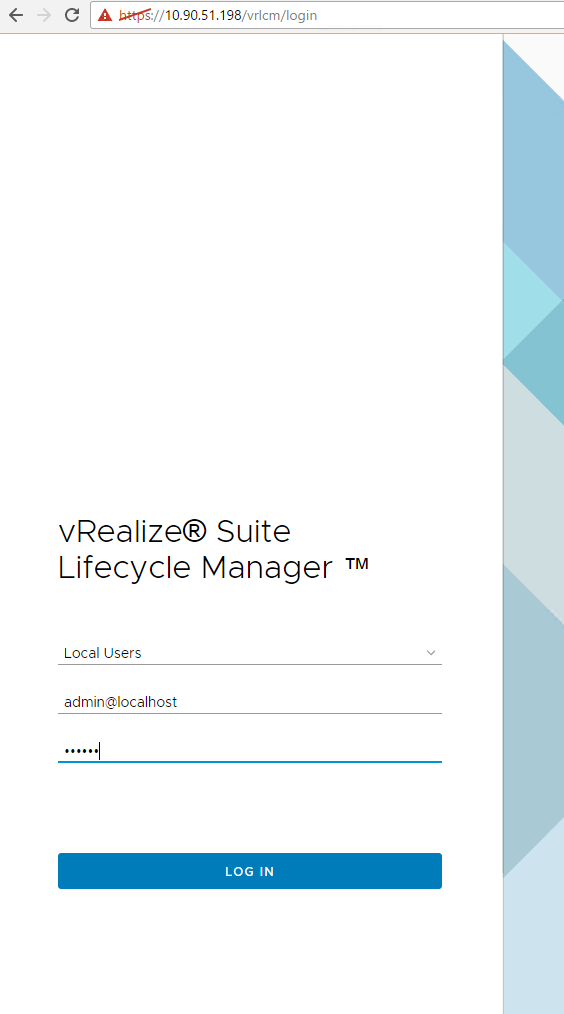
Once the vm has been deployed and powered ON, you will have to go to a web browser to configure the appliance.

https://IP_Address_of_the_Appliance/vrlcm

vRLCM_Configuration01

use the following credentials to login into the life cycle manager web UI

username: admin@localhost

password: vmware

vRLCM_Configuration02


vRLCM_Configuration03
The first thing you get after logging into the web UI is to update the root password

vRLCM_Configuration04

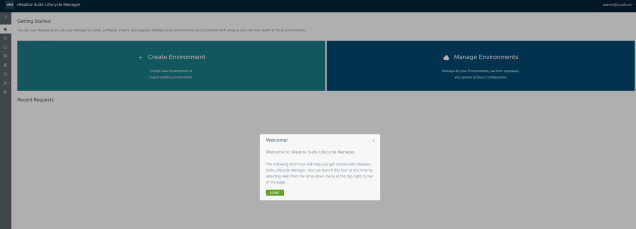
Click start to get started with the Life Cycle Manager

vRLCM_Configuration05

vRLCM_Configuration06

vRLCM_Configuration07

vRLCM_Configuration08

vRLCM_Configuration09
Once you click Next, it will say Done!

Now, we will create a New Environment in the lab

Click on Create Environment option to get started

Once you click on Create Environment option, you will be taken to a tab where it mentions that you will need to take care of a few things before you create the environment.

vRLCM_Configuration10.png

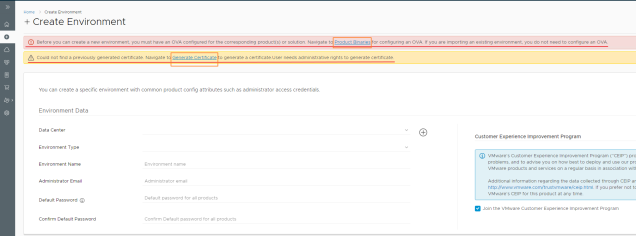
Let us take care of the Product Binaries first.

Click on Product Binaries option on the tab

vRLCM_Configuration11

vRLCM_Configuration14
I have used my VMware portal credentials to get the product binaries as I couldn’t get the local and NFS to work to get the product OVA’s.

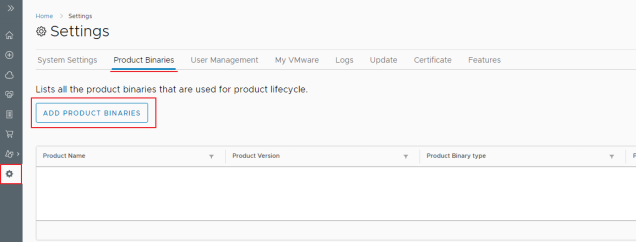
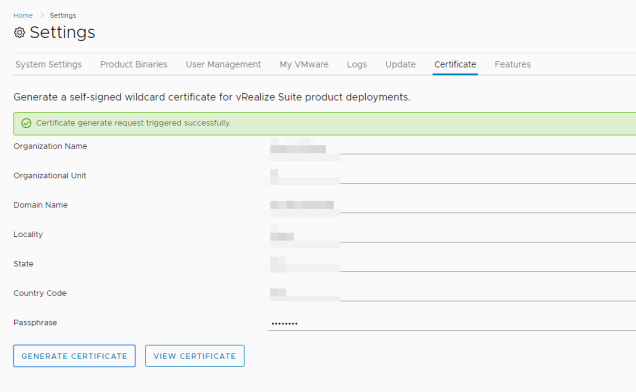
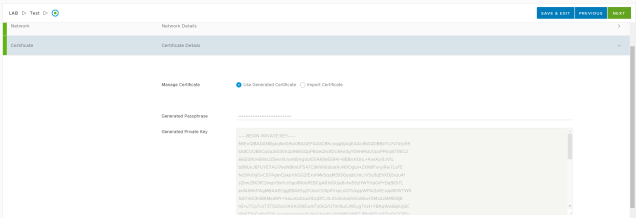
Once you add the product binaries, let’s go and create a Certificate

vRLCM_Configuration12

vRLCM_Configuration13

Once these two pre-requisites are done, Let us move ahead …

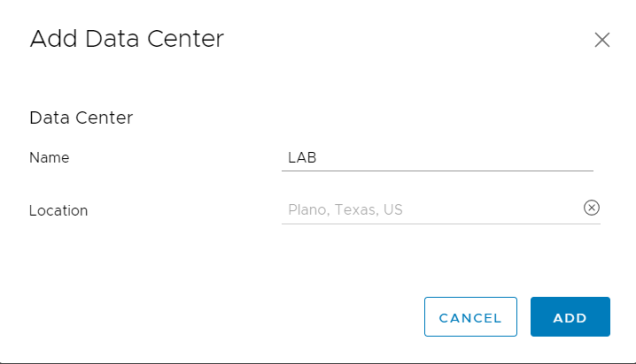
On the main page, click on the Datacenters option on the left-hand side to create a Datacenter before we create the environment

vRLCM_Configuration15

vRLCM_Configuration16
Click on Add Data Center to provide a name for the Datacenter

vRLCM_Configuration17

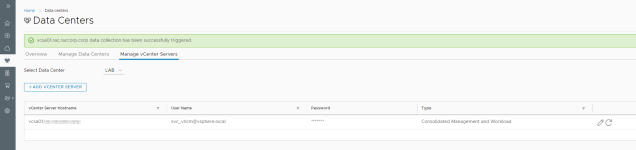
Next, we add the vCenter server

vRLCM_Configuration18

vRLCM_Configuration19

vRLCM_Configuration20

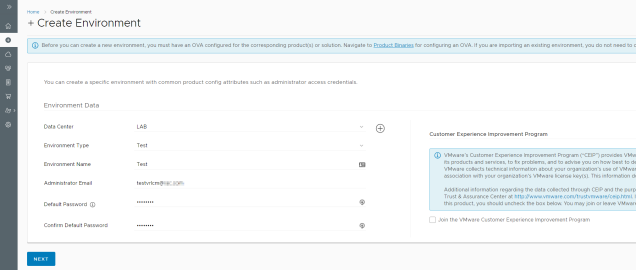
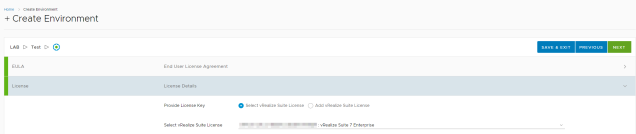
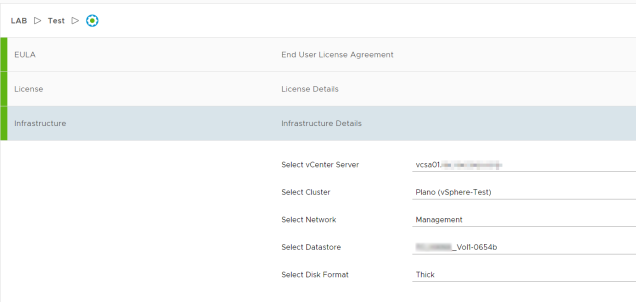
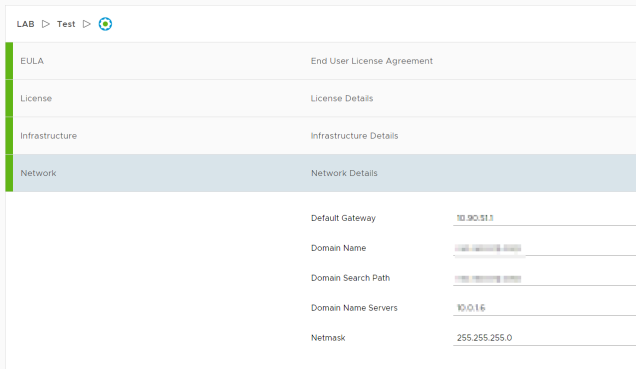
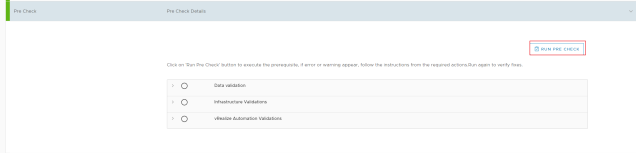
Now, Let us go ahead and create an Environment

vRLCM_Configuration21

vRLCM_Configuration22

vRLCM_Configuration23
Accept the EULA Agreement by scrolling down, once you accept it, the NEXT button will appear

vRLCM_Configuration24

vRLCM_Configuration25

vRLCM_Configuration26

vRLCM_Configuration27

vRLCM_Configuration28
Provide all the required information. I have provided an existing SQL server and IAAS server, I have used 1 IAAS server for DEM Worker, Orchestrator, Proxy service
vRLCM_Configuration29
Click on RUN PRE CHECK option to perform the pre-checks before it deploys the environment

vRLCM_Configuration30

In this pre-check, you could get a validation failure which will need to be rectified before you run the pre-check again. its like shown in the picture below

vRLCM_Configuration31

vRLCM_Configuration32

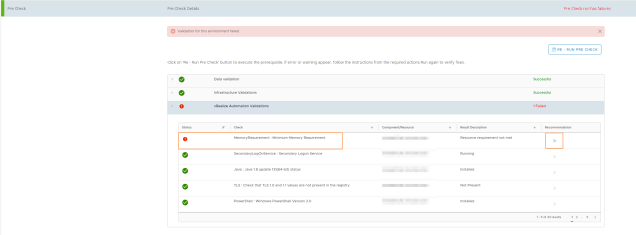
Once you rectify the issue, run the pre-check again

vRLCM_Configuration33

Once the pre-check comes back clean, click on Next to move ahead

vRLCM_Configuration34


Click Submit and the life cycle manager will do the rest.

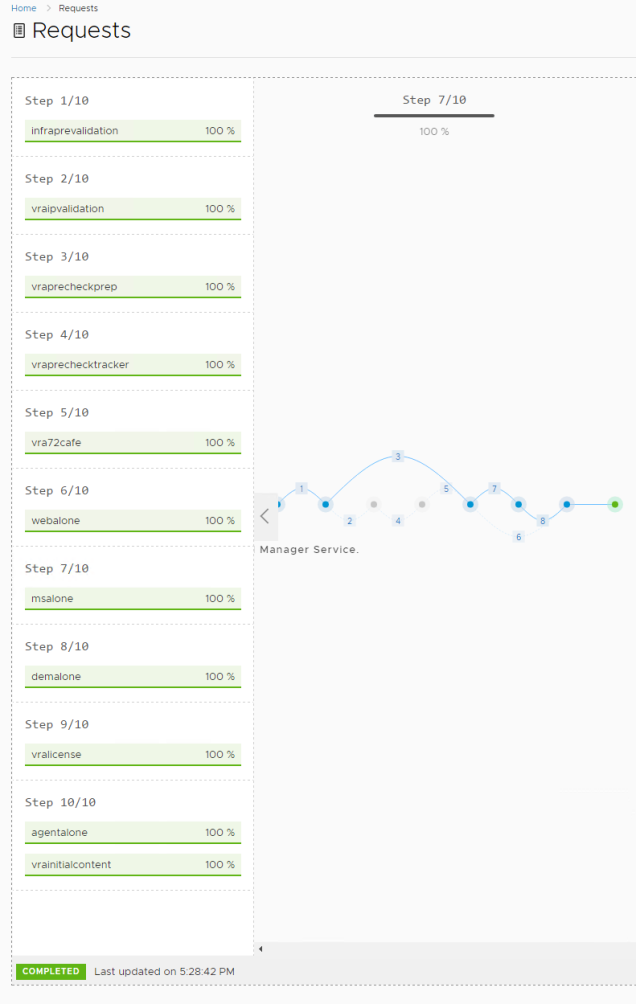
to check the progress, you can click on Requests icon on the left side of the page and clicking on in progress as the pic below

vRLCM_Configuration35

vRLCM_Configuration36

This process will take a long time … go, get some tea/coffee and it will still be deploying the environment …

vRLCM_Configuration37

vRLCM_Configuration38

This shows how to Install and configure vRealize Life Cycle Management and to create a vRA 7.4 environment.


SQL Connectivity Issue with vRA 7.4

Hello Peeps, Recently I was configuring vRA 7.4 at a customer’s place and came across an issue where the vRA appliance tries to talk to the external SQL server and fails with an error.

Here is the error:

SQL_Config_Issue01

After digging into the logs on both vRA and on the SQL server, here is what was determined as the issue

The SQL server has TLS 1.0 disabled and the vRA appliance was trying to communicate to the SQL server using TLS 1.0 instead of TLS 1.2 as the client has disabled TLS 1.0 on all its windows servers.

SQL_Config_Issue02

Troubleshooting steps tried:

Tried enabling TLS 1.0 and its Ciphers on the SQL server with no success

Checked with the Firewall team and they said that there is no firewall between the vRA appliance and the SQL server

Tried this in a different environment and it worked fine, just doesn’t work in this particular environment.

Conclusion:


Looks like the issue was with the SQL server and its Service Pack. SQL Server 2012 needs SP3 or higher to accept TLS 1.2 protocol. As soon as I upgraded my SQL server to SQL 2012 SP4, the communication worked fine and the vRA appliance was able to talk to the SQL server!!

Hope this helps in case you come across this issue.

Add External PSC 6.0 U2 to Active Directory Domain

I have been thinking of writing this post for a while and here you go…

In vSphere 6.0 U2, you can have an External PSC or an Embedded PSC. The below process is to add an External PSC to the Active Directory Domain.

Login into the vCenter server, go to Administration tab, go to System Configuration –> Nodes and click on the PSC node you want to add to the domain.

psc01_Domain_setting
Click on the node, go to Manage tab, click on Active Directory and click on Join button
psc01_domain_join01
Provide the Domain name and its credentials (It could be a read-only service account in the domain) to join the PSC to the domain

psc01_domain_join02

once credentials are provided, click OK to proceed.

Note that the only way for you to know that this process is complete is that you get no error and there is no entry in the recent tasks tab in the vSphere web client. If that is the case then the domain add is successful.

Now, you will need to reboot the PSC

psc01_domain_after_psc01_reboot
Once the PSC is rebooted, you can go back into the vCenter server and to the node and you can see that this node (PSC) is now added to the domain.

In a similar way, you can add the remaining PSC’s to the domain and finally, you will need to add the Identity source to the vCenter server itself under single sign-on


Install and Configure vSphere Data Protection (VDP) 6.1.8

In this post, I will be installing and configuring vSphere Data Protection 6.1.8 in vCenter 6.5 Environment

first, login into the vCenter 6.5 web client (flash) and Deploy the ova template and select the VDP.ova file to deploy.

select_vdp_ova_file

ova_template_install_01

ova_template_install_02

ova_template_install_03

ova_template_install_04

ova_template_install_05
Select the Storage (Datastore) you want to deploy this appliance in and click Next
ova_template_install_06
Select the Network where you want to Deploy this appliance and click Next
ova_template_install_07
Provide the Network details such as DNS servers, IP address, Subnet mask, the default gateway of the appliance and click Next

Check all the information entered and click finish for the VM to be deployed in the environment.

Once the appliance is deployed, power in ON

configure_vdp_01

Once the appliance is powered on, go to the web browser to https://Appliance_IP_Address_or_FQDN:8543/vdp-configure to start the configuration of VDP

configure_vdp_02
In the Web UI, login as root and the default password is changeme , login into the web UI and change the root password

configure_vdp_03

configure_vdp_04
Check the Network settings as these settings will be automatically populated from the values you set while deploying the appliance

configure_vdp_05

configure_vdp_06
Provide a new root password for the VDP appliance
vdp_vcenter_registration_01
Once you enter the details of the External PSC under SSO FQDN you can hit ‘Test Connection’

vdp_vcenter_registration_02

configure_vdp_07
We now create new storage as this is the first VDP appliance being deployed

configure_vdp_08

configure_vdp_09

configure_vdp_10

configure_vdp_11
Click Yes to start the configuration
configure_vdp_12
Once the process completes, the appliance will restart and you can get into the main Web UI
vdp_main_page_URL
Use this URL to get into the VDP Configuration Web UI

vdp_main_page

vdp_main_UI_vCenter_Home
This is the UI you see when you login into the vCenter Web Client and click on VDP menu item

SSO Server test failed when Configuring VDP 6.1.8 during vCenter Registration

Recently, I came across an issue while configuring a new instance of VDP 6.1.8 appliance while performing vCenter Registration to the vCenter appliance 6.5 with an external Platform Services Controller.

below is the error message I have been getting

vdp_error_vcenter_registration

I have provided the administrator account user credentials to the VCSA (vCenter server) with the default ports but still received the error.

Upon some deep troubleshooting, found out that the SSO server is the Platform Services Controller (PSC) since my environment had an external PSC and here is how you resolve this issue:

De-select the checkbox “Use vCenter for SSO authentication”, and add the Platform Services Controller hostname/IP in the new SSO entry line.

vdp_vcenter_registration_01

Now, you can test the connection and it will be a success

vdp_vcenter_registration_02

This is how the issue was resolved. Hope it helps someone out there.

This is with VDP version 6.1.8 connecting to VCSA 6.5 with External PSC