Here is a simple script to obtain the placement of the physical disk by naa on ESXi hosts
Copy below script and save it on the ESXi host
# Script to obtain the placement of the physical disk by naa on ESXi hosts
# Do not change anything below this line
# --------------------------------------

echo "=============Physical disks placement=============="
echo ""

esxcli storage core device list | grep "naa" | awk '{print $1}' | grep "naa" | while read in; do

echo "$in"
esxcli storage core device physical get -d "$in"
sleep 1

echo "===================================================="

done
Run the script:
[root@esxi1:~] sh disk.sh

You will get similar output as per your environment.
Output:
Recently, I had to Search for an QLogic 2x25GE QL41262HMCU CNA NIC driver to update it on multiple Dell R740XD hosts. It’s been a while since I used the Update Manager (vSphere 6.7 environment) and hence writing this post.
First thing is to SSH into an esxi host and then execute the following commands to check the firmware/driver version of the vmnic you want to update (In my case all my vmnics are Qlogic CNA NIC’s)
esxcli network nic get -n vmnic2
Output to the above esxcli command
Things to note is the Driver Name/Type, Firmware Version (First Part of it is sufficient), Version (This is the actual driver version on the esxi host).
In the Above screenshot the driver is ‘qedentv’, the firmware version is 8.53.3.0 and the version is 3.11.16.0
VID, DID, SVID and Max SSID to get the exact driver for your nic.
Let us fill in the values from our vmkchdev output
VID 1077
DID 8070
SVID 1077
Max SSID 000b
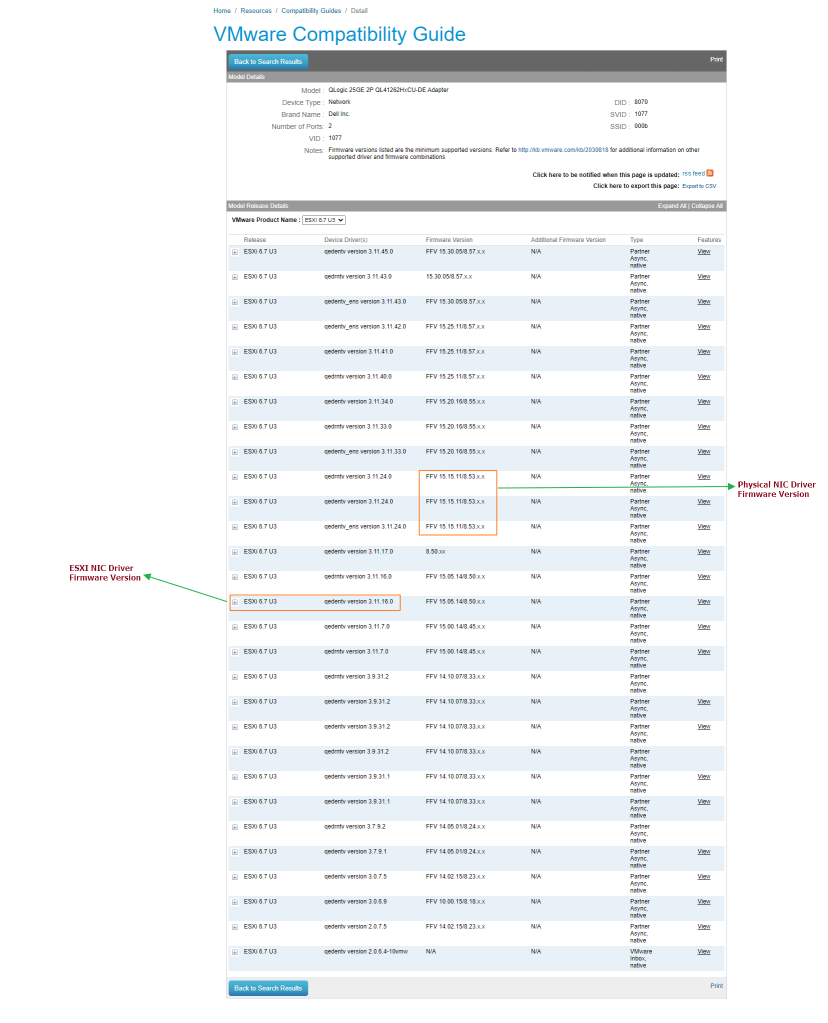
Input the values in VMware IO Compatibility list websiteQlogic Adapter and its versions by vSphere version
Select the vSphere version and click on the version to display the different driver versions we can download
I have selected vSphere version 6.7 U3 in this case and the screenshot is below
The esxi nic driver version and the physical adapter firmware version is different on my Dell server
As you can see, the esxi nic driver version and the physical nic adapter firmware versions are different on this Host. (Typically you should update the esxi nic driver once you upgrade the physical nic firmware as a best practice)
In this case my esxi nic driver version is 3.11.16.0 and the Qlogic NIC Physical firmware version is 8.53.x.x
To download the correct driver, you need to make sure that the esxi nic driver coincides with the Physical nic driver firmware for best compatibility. We will need to download the ‘qedentv’ driver.
We download the driver equal to the physical nic firmware version and the esxi nic driver name which is qedentv in this case
Download the driver.zip file using your my vmware credentials and you can use this zip file in the offline patches in Update Manager to create a baseline for your esxi hosts so this driver can be updated.
NOTE: Put the Host in Maintenance mode before you update the nic driver as this will reboot the esxi host.
I have recently been working with esxi hosts and to decommission them and recommission them into new projects and had to use the command vmkping to test the MTU of certain types of vmkernel ports like VMOTION, VSAN, VTEPs etc.
Here is a refresher for the vmkping commands which are very useful for a day to day Virtual Administrator
Command to check the MTU of 9000 with a certain amount of packets and with a certain interval and using a certain vmkernel port
In one of the above command vmkernel port is vmk3, for MTU 9000, we will be using 8972 as the packet size , -c is the count of packets and -i is the interval for which the ping will work (In the above example it is 0.005 seconds)
The second command is to test the MTU 1500 and the IP to test. You can also add -I (Interface) and vmkernel port through which you want to ping the IP
Command to check the communication of an IP address through an vmkernel port
vmkping -I vmk# IP address of the host
Command to get all the network adapters and the type of tcp/ip stack assigned to the nics
esxcfg-vmknic -l
Using the above command you can check the netstack which will be used in the below command to ping a vmotion vmkernel port
vmkping -S vmotion -I vmk1 <IP_Address_to_ping>
The -S is for netstack name like vmotion and this is the only command to be used if we use a NetStack
List of arguments:
vmkping [args] [host/IP_Address]
args:
  -4                            use IPv4 (default)

  -6                            use IPv6

  -c <count>            set packet count

  -d                           set DF bit (IPv4) or disable fragmentation (IPv6)

  -D                           vmkernel TCP stack debug mode

  -i <interval>           set interval (secs)

  -I <interface>         outgoing interface – for IPv6 scope or IPv4 bypasses routing lookup

  -N <next_hop>       set IP*_NEXTHOP – bypasses routing lookup

                                  for IPv4, -I option is required

  -s <size>                 set the number of ICMP data bytes to be sent.

                                  The default is 56, which translates to a 64 byte

                                  ICMP frame when added to the 8 byte ICMP header.

                                 (Note: these sizes does not include the IP header).

  -t <ttl>                   set IPv4 Time To Live or IPv6 Hop Limit

  -v                            verbose

  -W <timeout>        set timeout to wait if no responses are received (secs)

  -X                            XML output format for esxcli framework.

  -S                           The network stack instance name. If unspecified the default netstack instance is used.
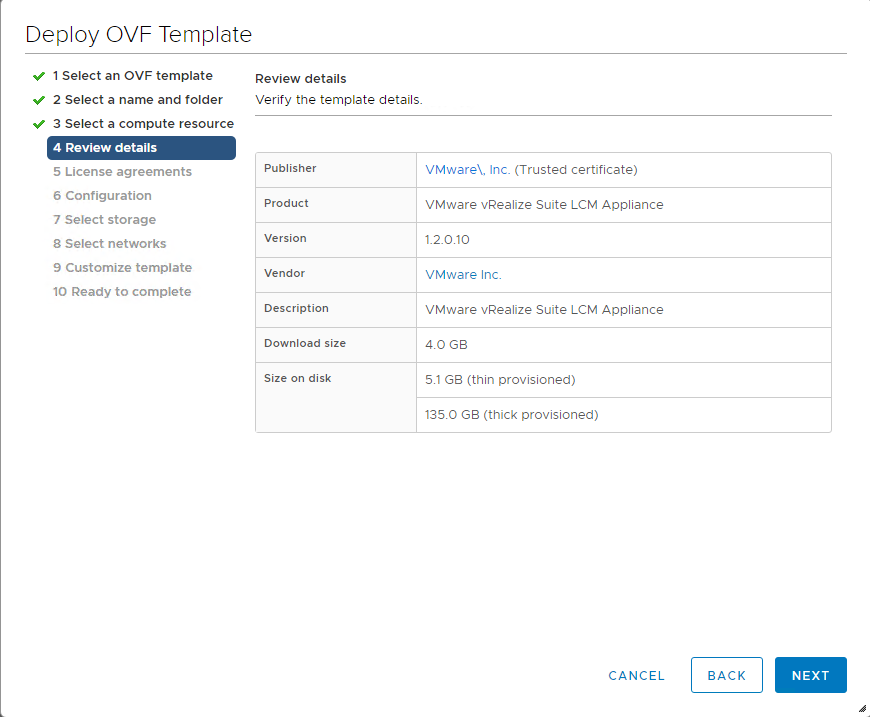
This post details the installation and configuration of the vRealize Suite Life Cycle Manager 1.2 which was recently released by VMware to automatically provision vRA components as part of their Cloud initiative.
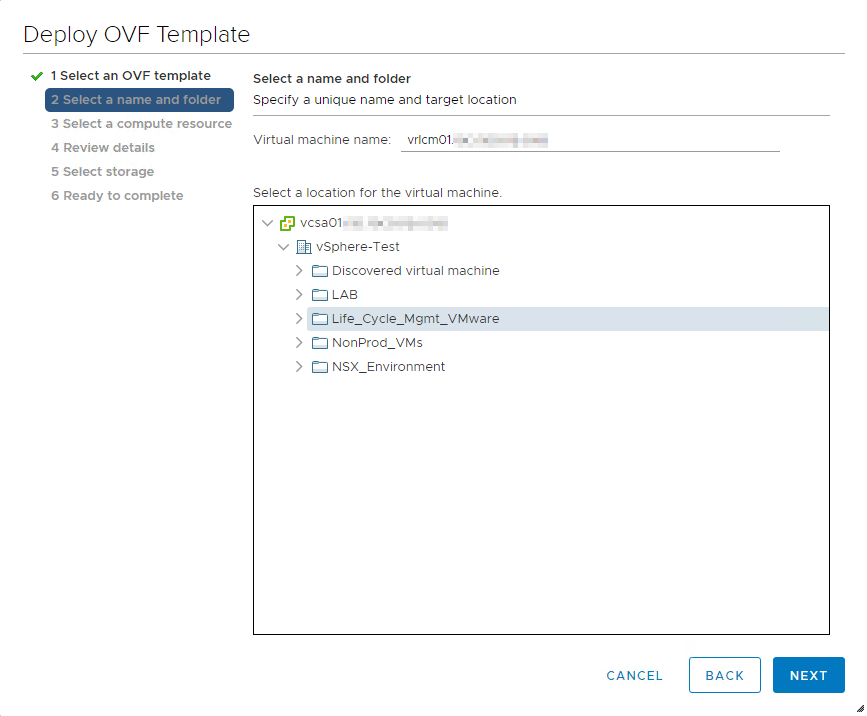
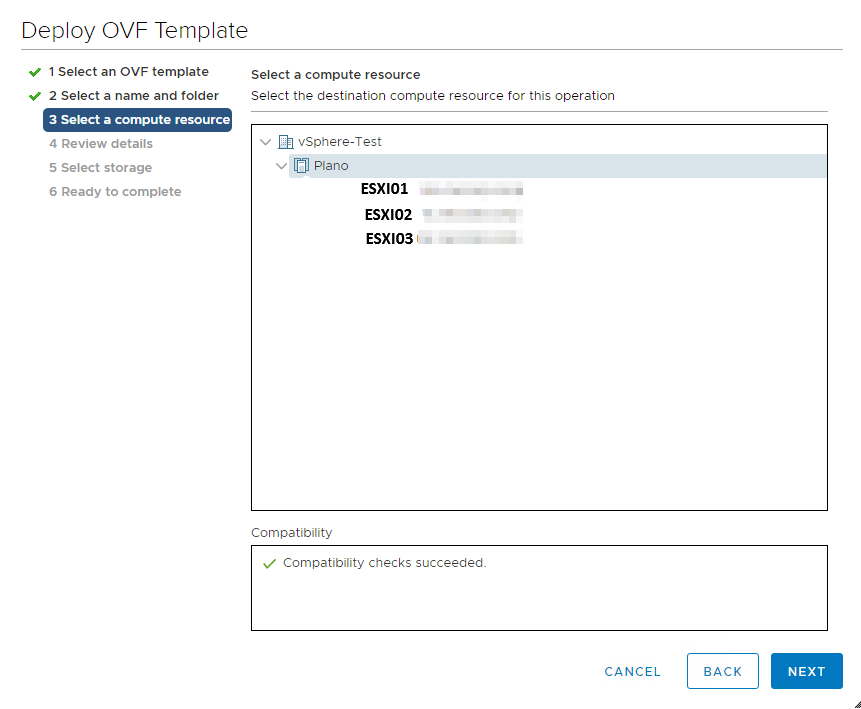
First, Download the Life Cycle Manager ova from the vRealize Suite 2017 components and deploy it using the vCenter web client
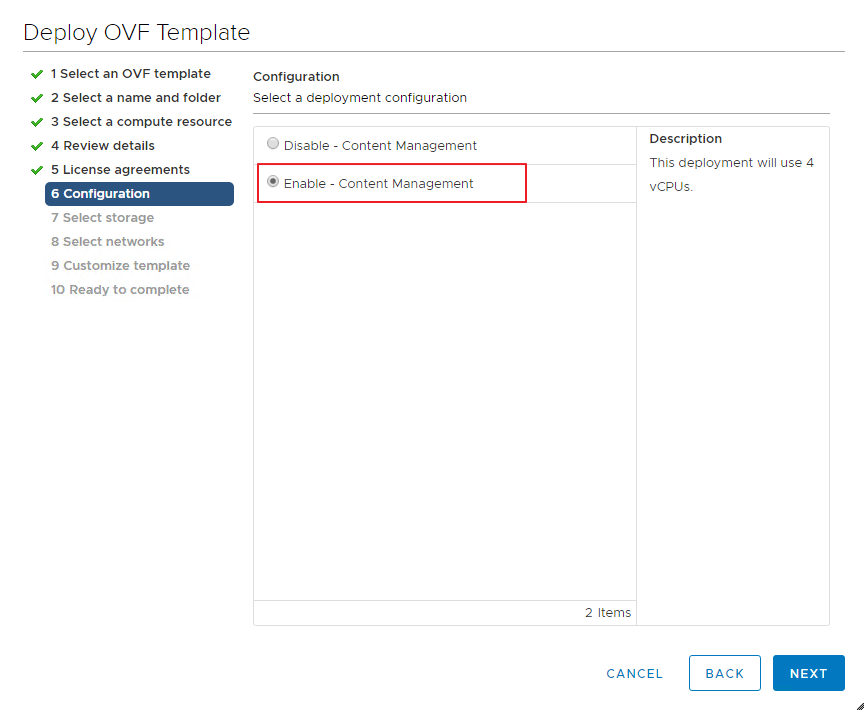
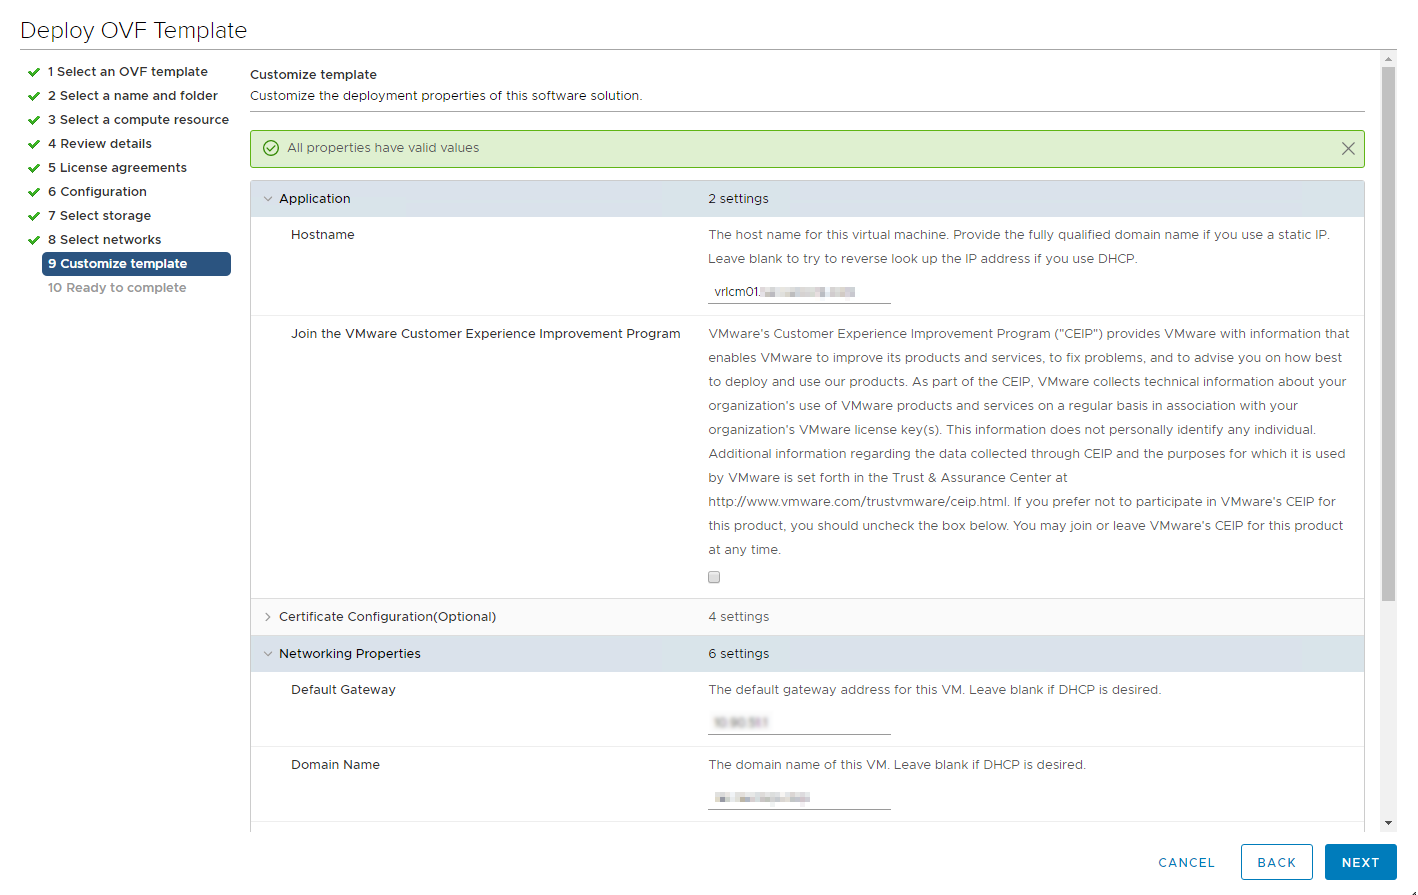
Select Enable Content Management option to enable content management.
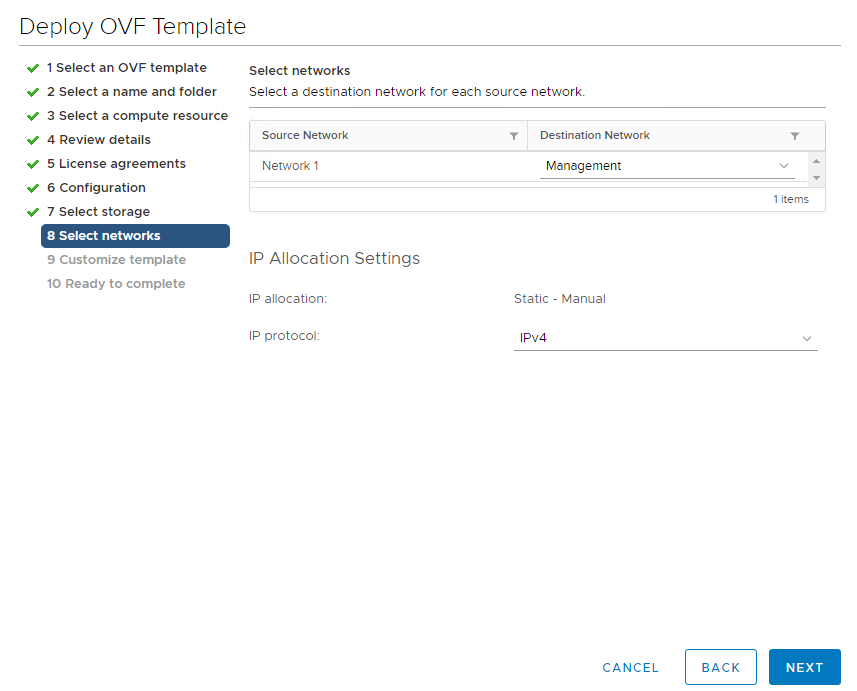
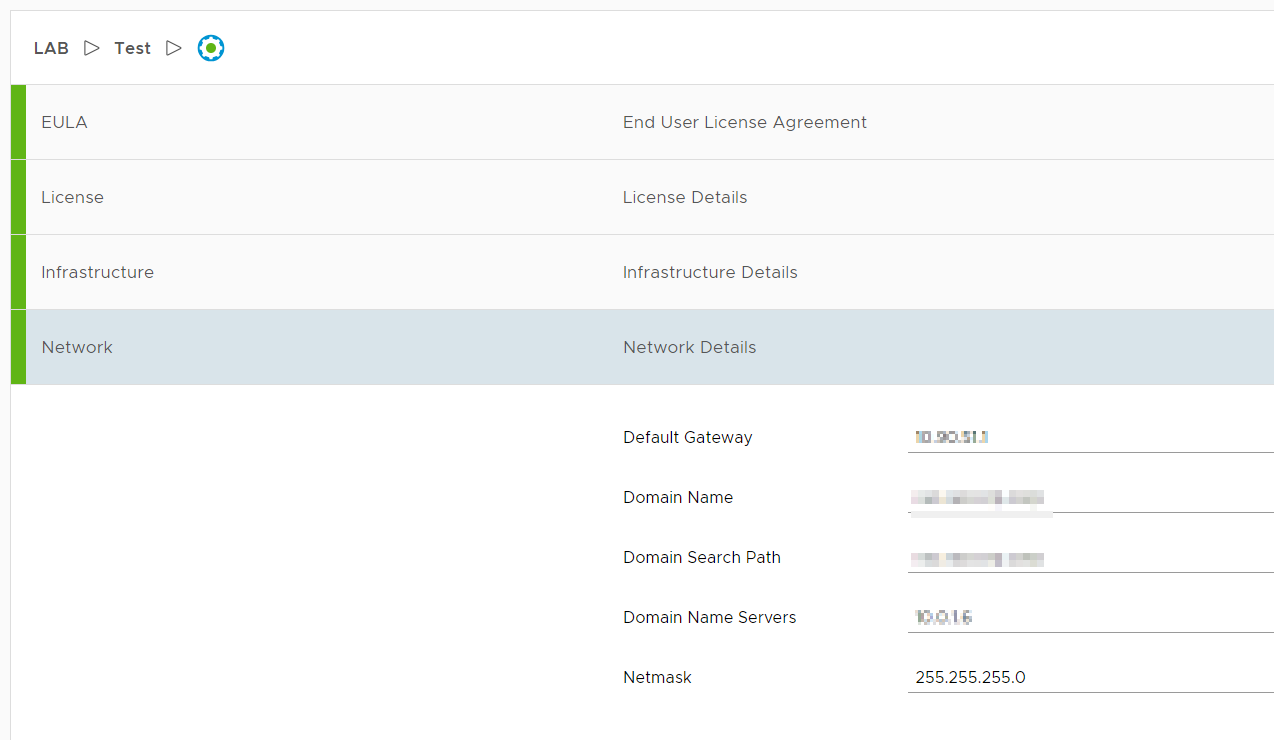
Provide the Hostname, default gateway, network IP address, subnet mask, DNS servers and the domain names in this window and click Next to finalize the deployment of the appliance.
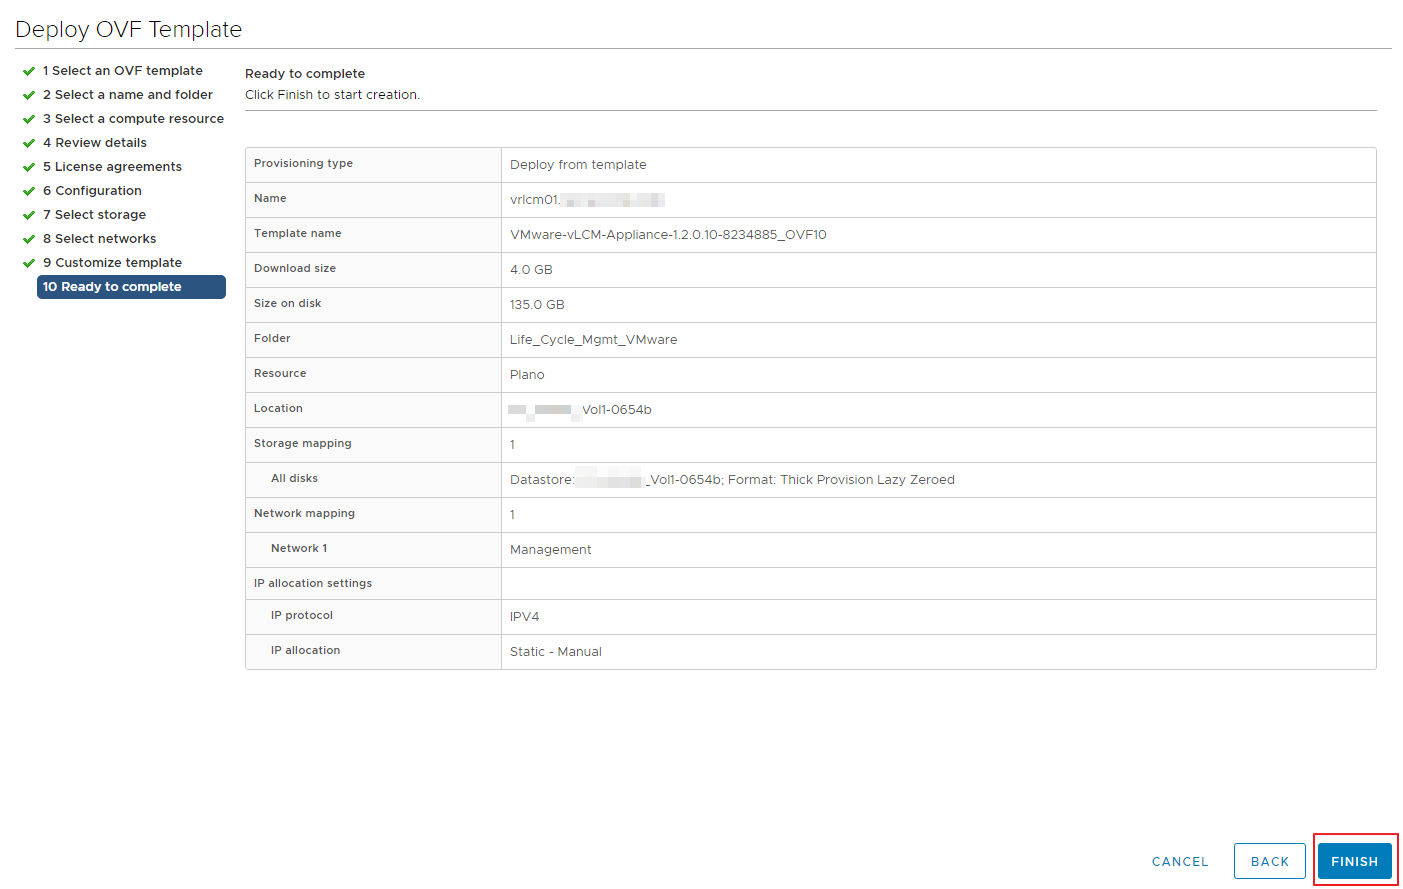
Click Finish to finalize the settings and to deploy the Life Cycle Manager Appliance
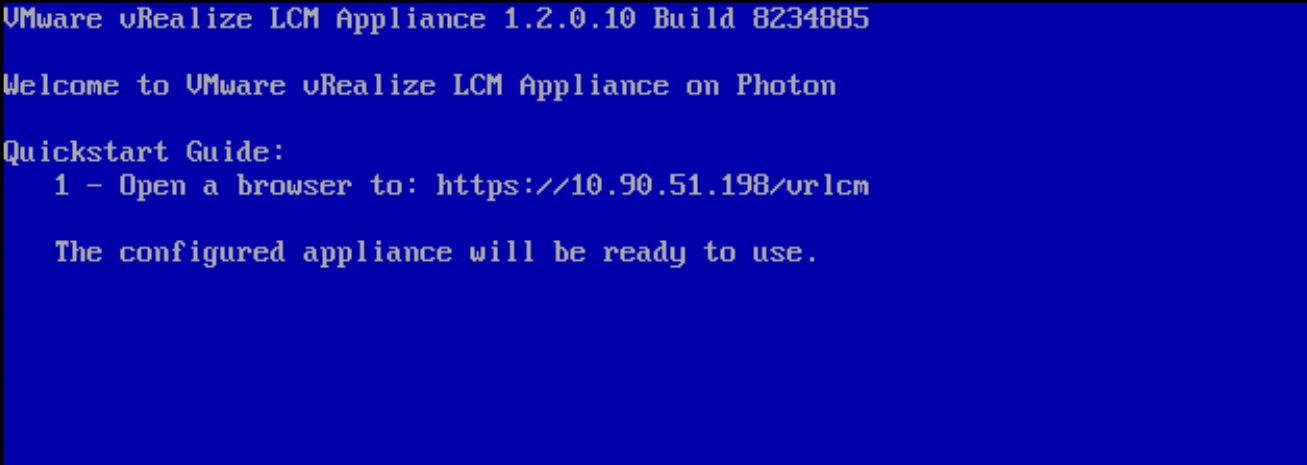
Once the vm has been deployed and powered ON, you will have to go to a web browser to configure the appliance.
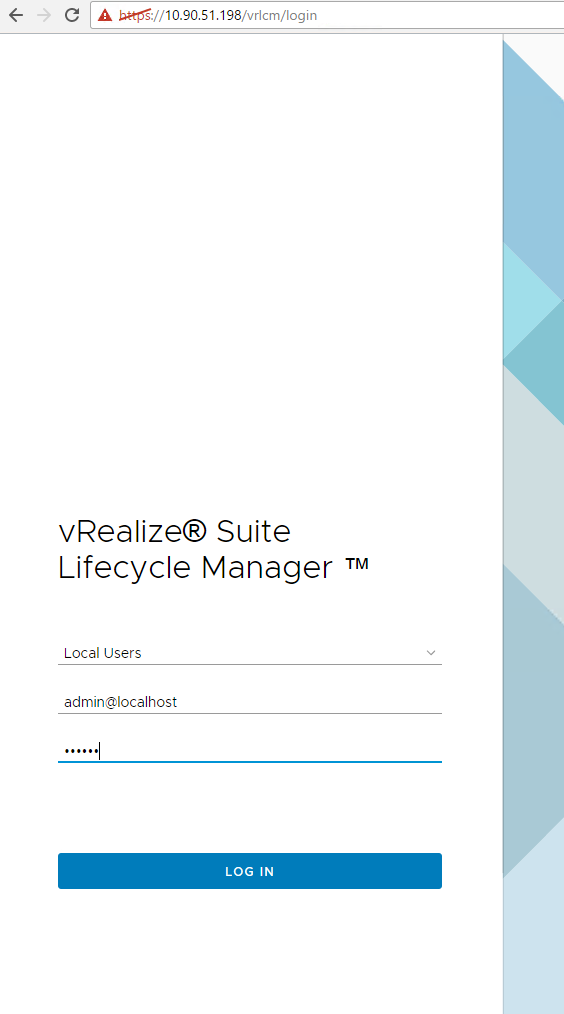
use the following credentials to login into the life cycle manager web UI
username: admin@localhost
password: vmware
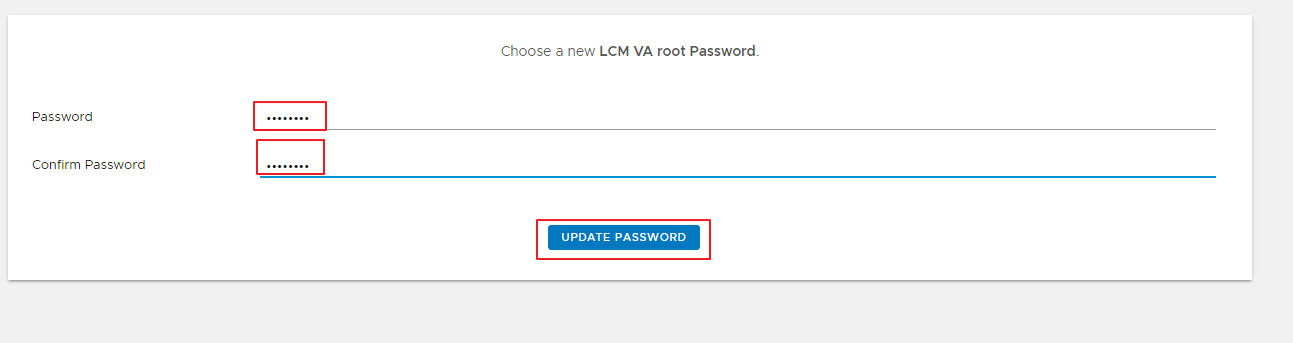
The first thing you get after logging into the web UI is to update the root password
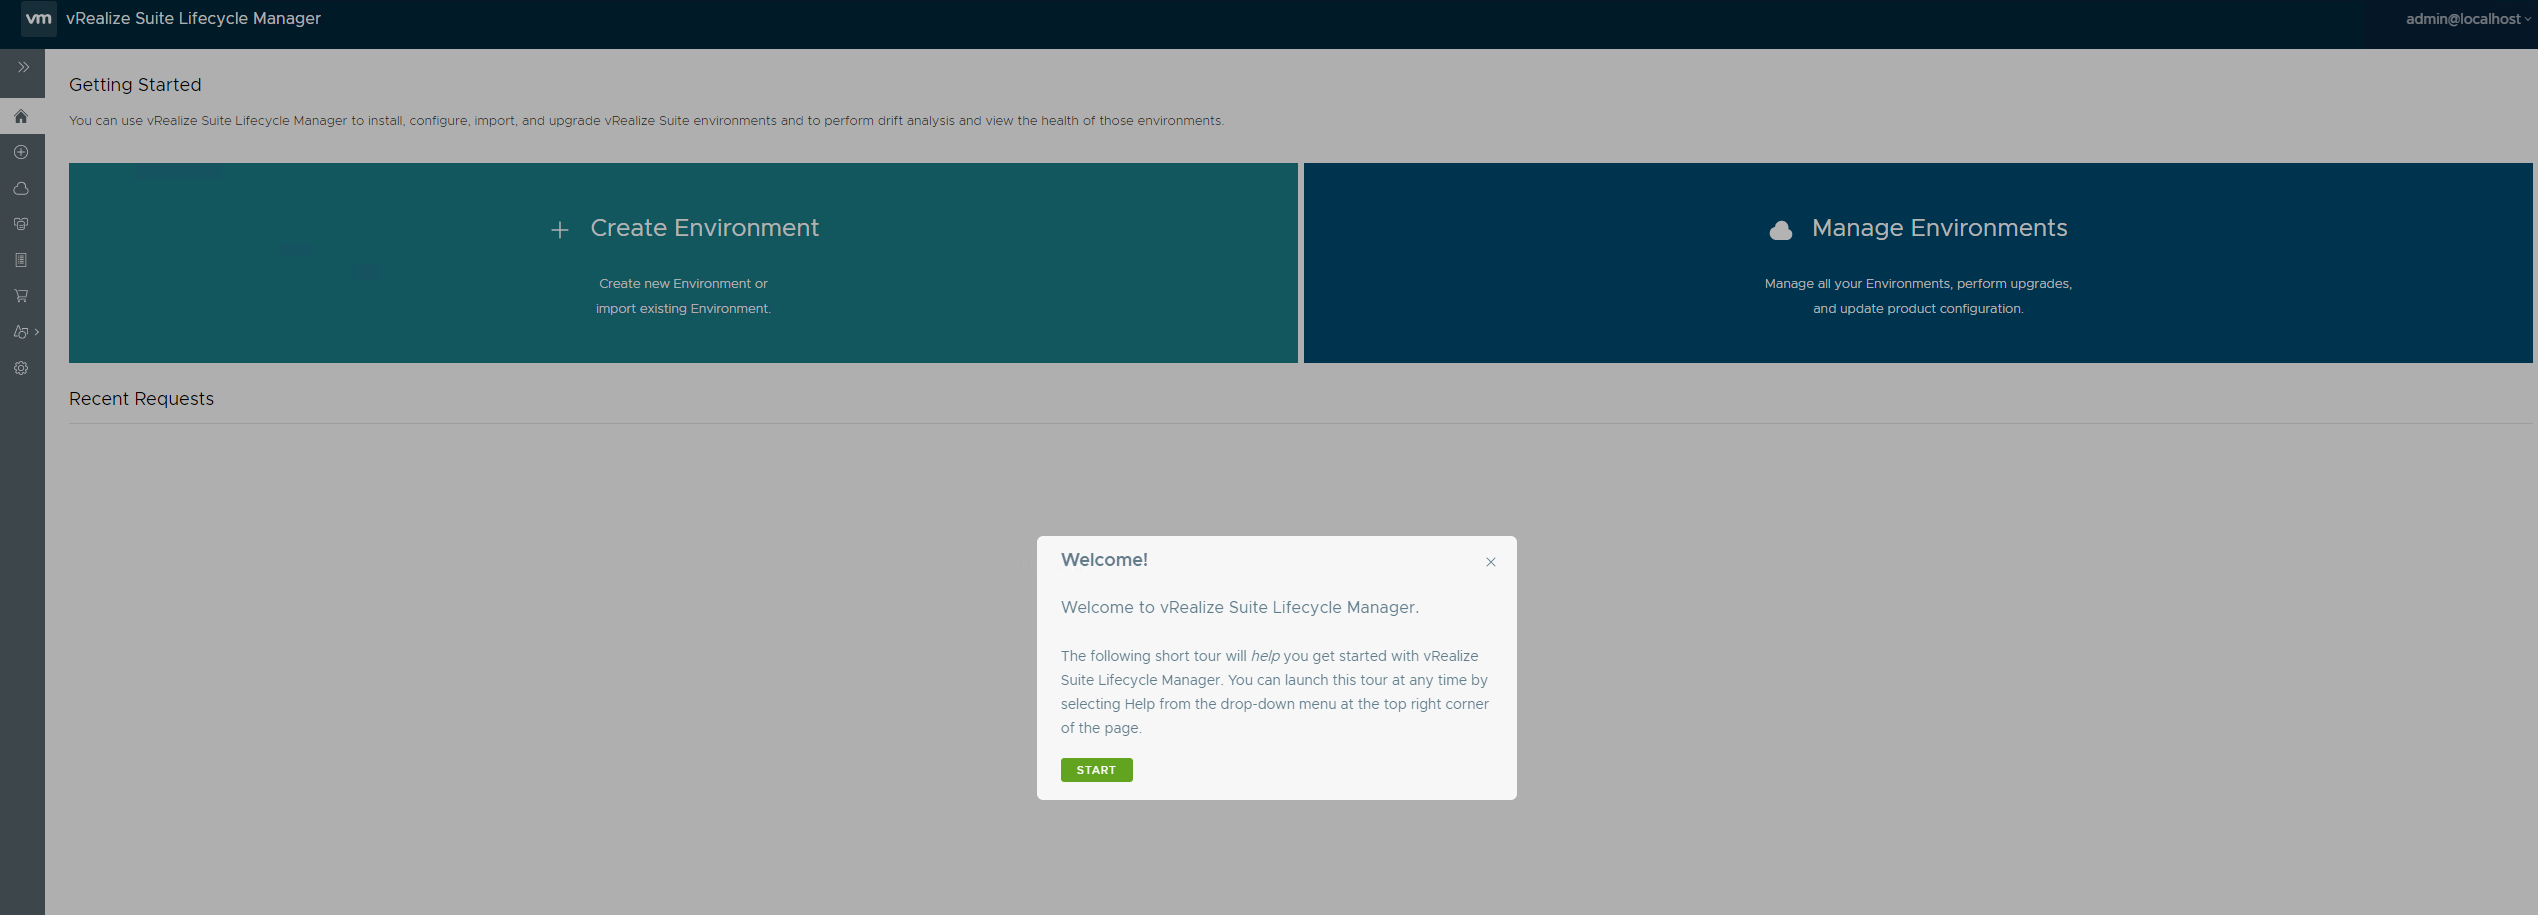
Click start to get started with the Life Cycle Manager
Once you click Next, it will say Done!
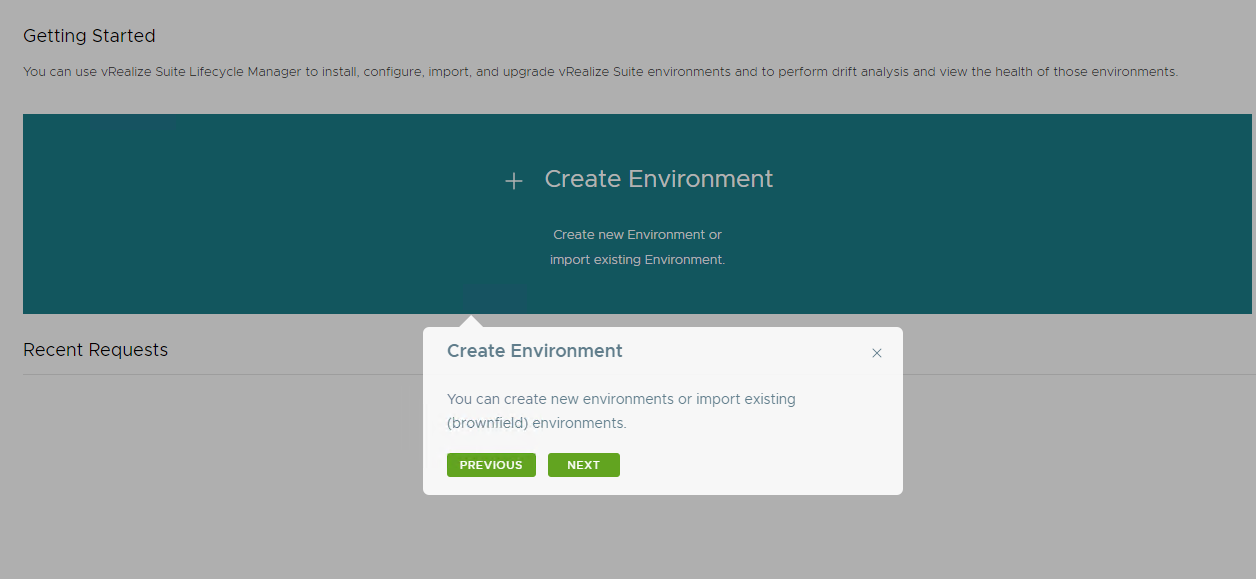
Now, we will create a New Environment in the lab
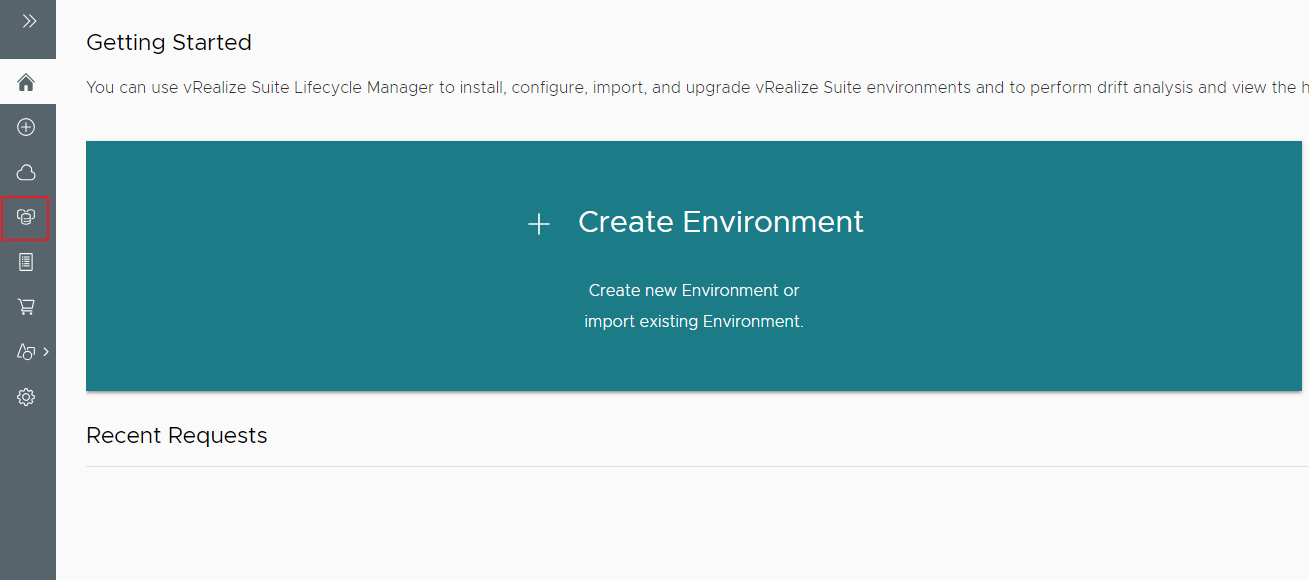
Click on Create Environment option to get started
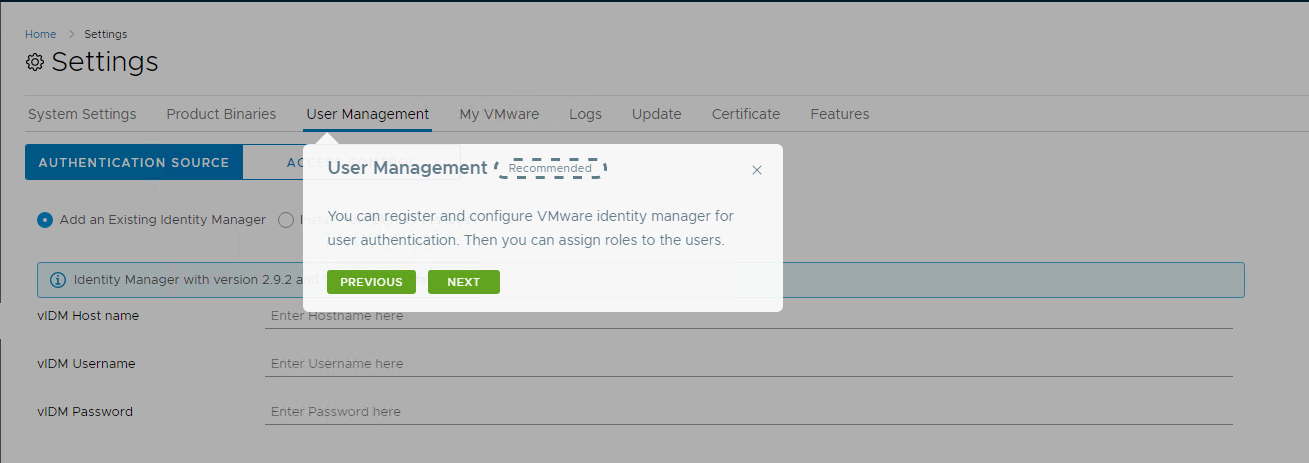
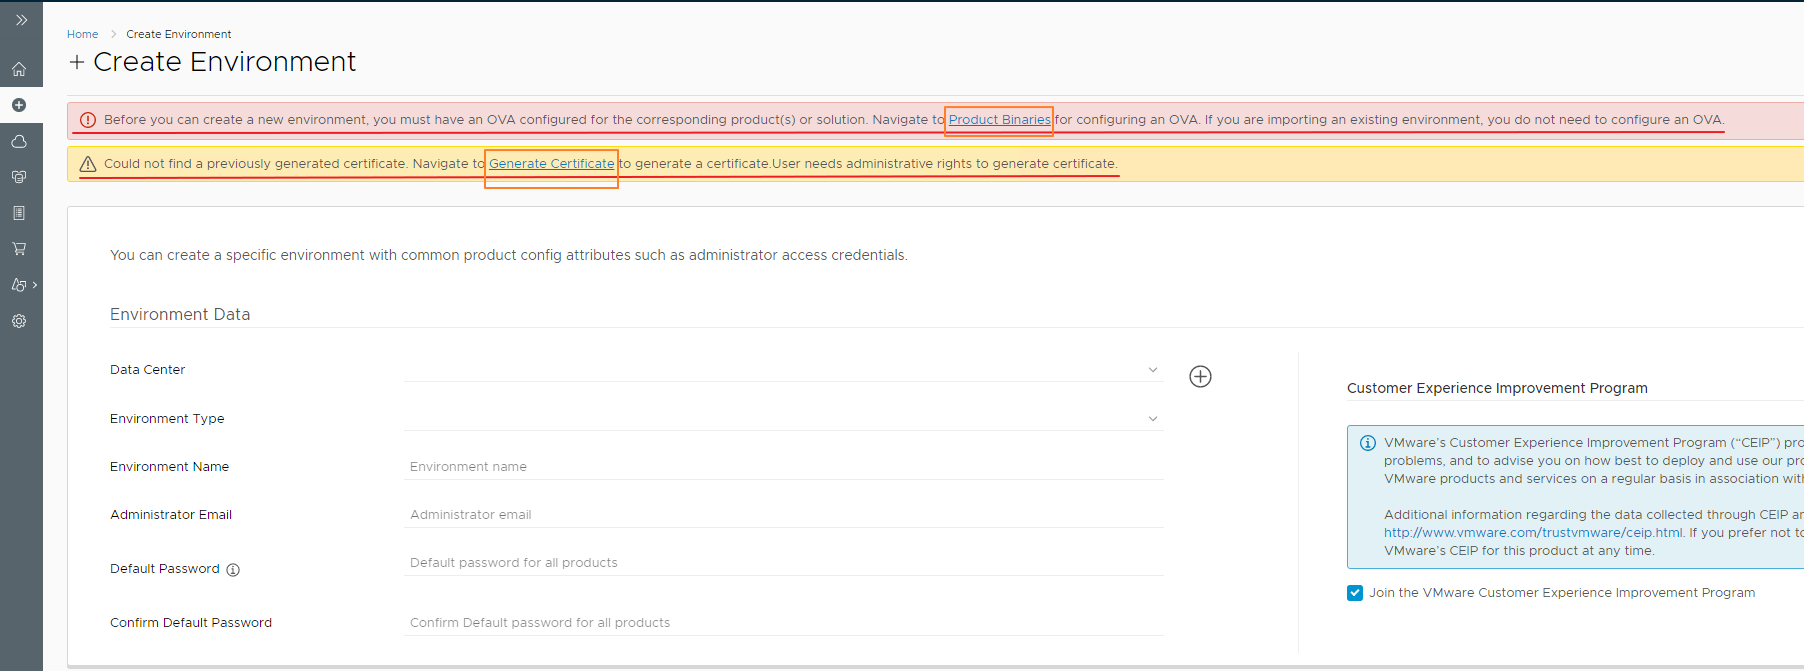
Once you click on Create Environment option, you will be taken to a tab where it mentions that you will need to take care of a few things before you create the environment.
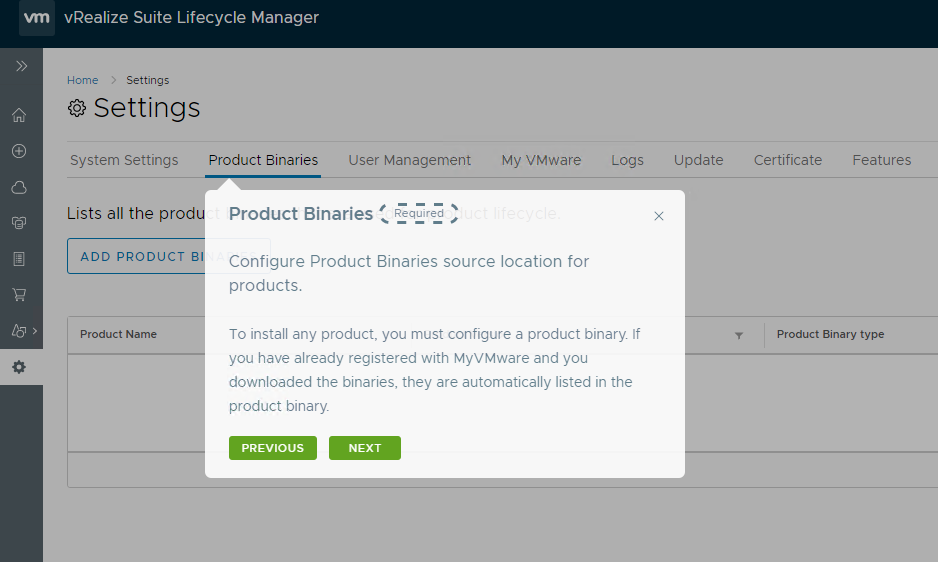
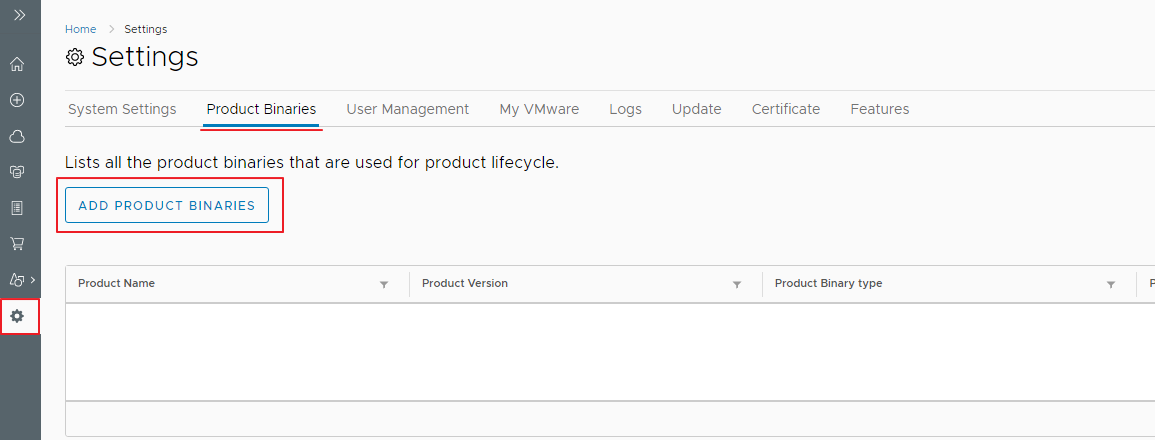
Let us take care of the Product Binaries first.
Click on Product Binaries option on the tab
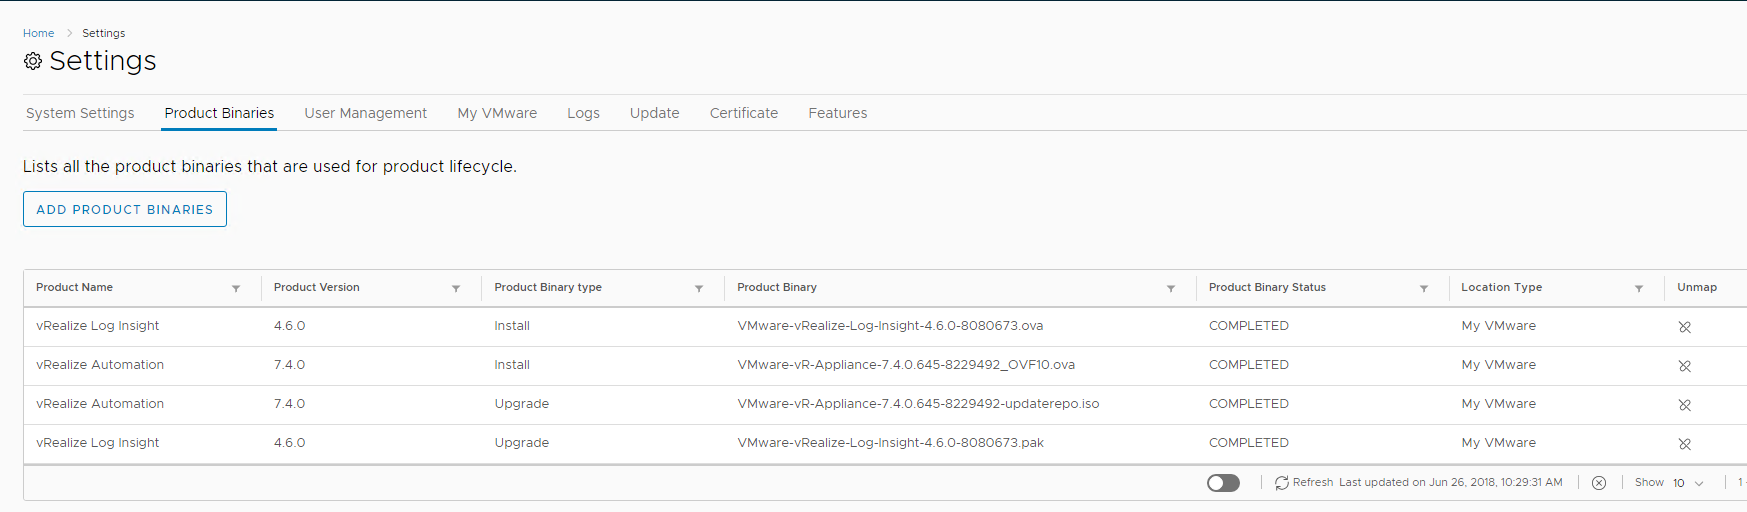
I have used my VMware portal credentials to get the product binaries as I couldn’t get the local and NFS to work to get the product OVA’s.
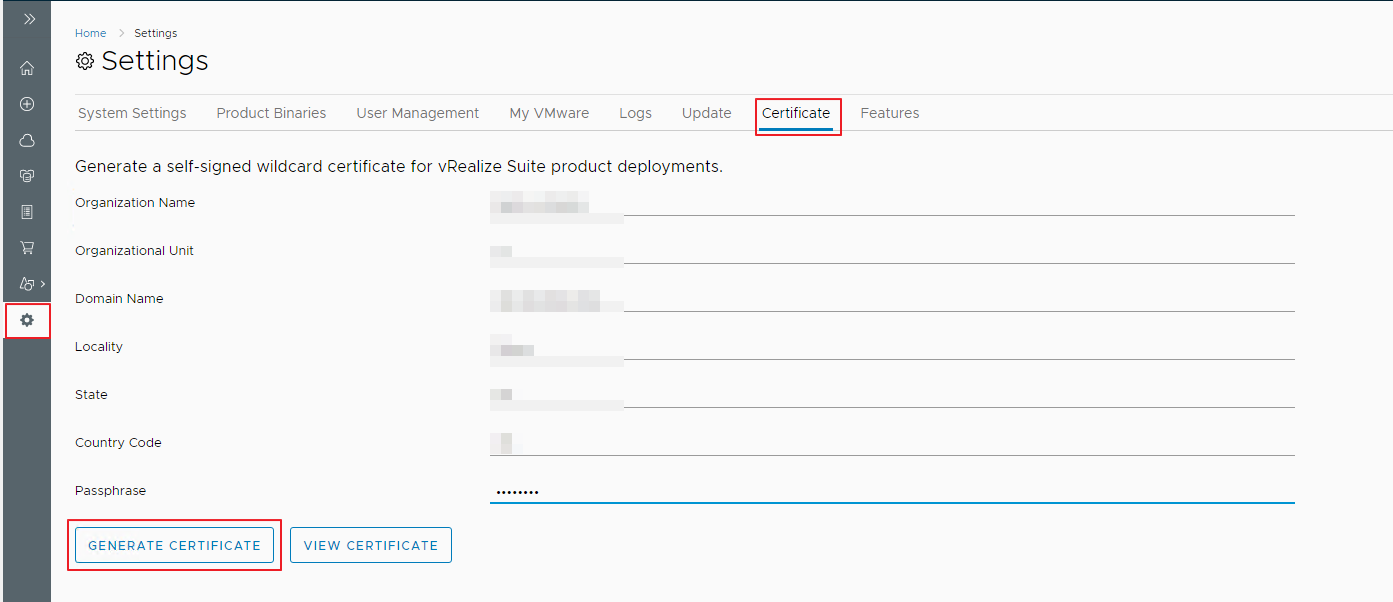
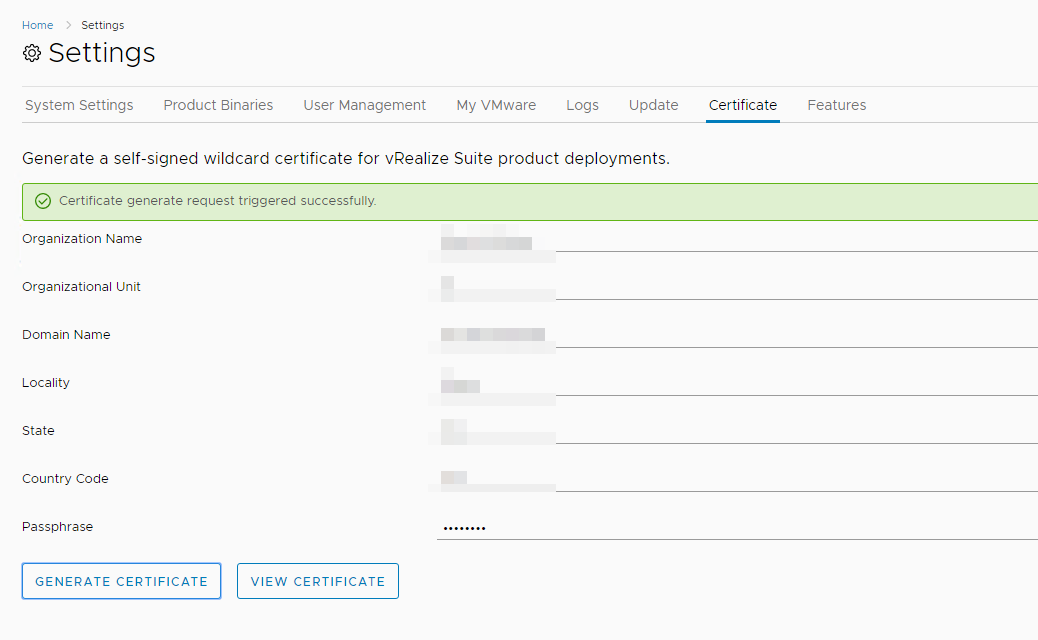
Once you add the product binaries, let’s go and create a Certificate
Once these two pre-requisites are done, Let us move ahead …
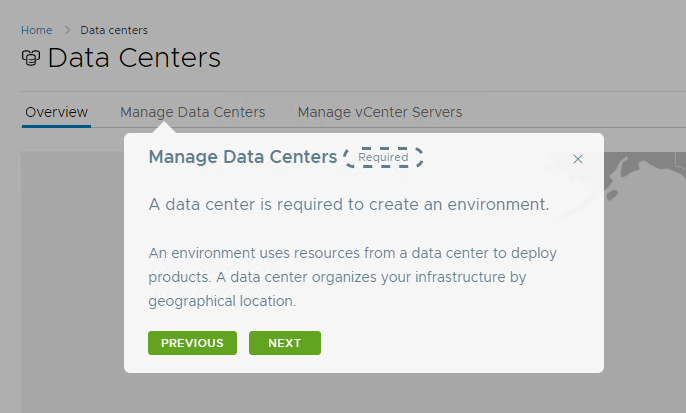
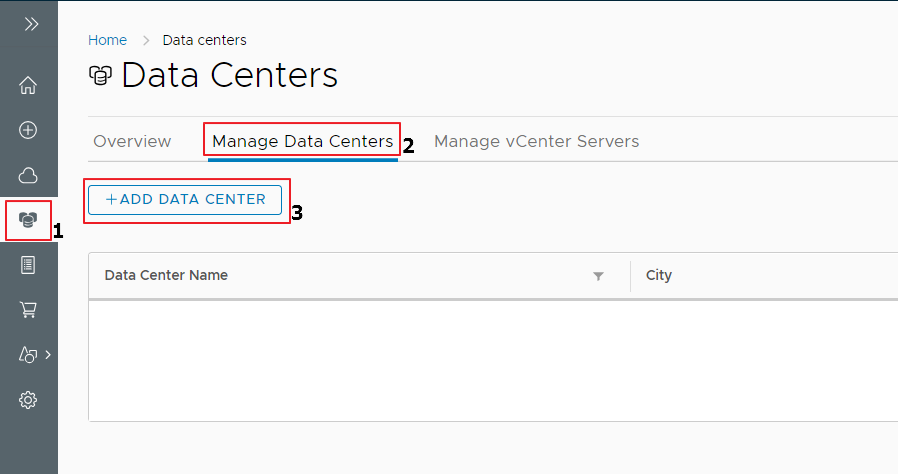
On the main page, click on the Datacenters option on the left-hand side to create a Datacenter before we create the environment
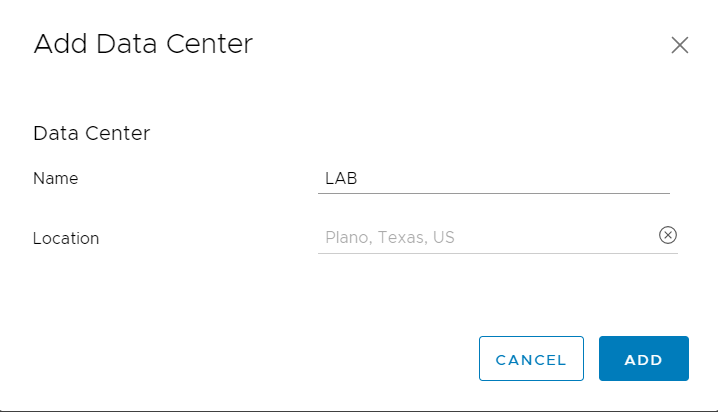
Click on Add Data Center to provide a name for the Datacenter
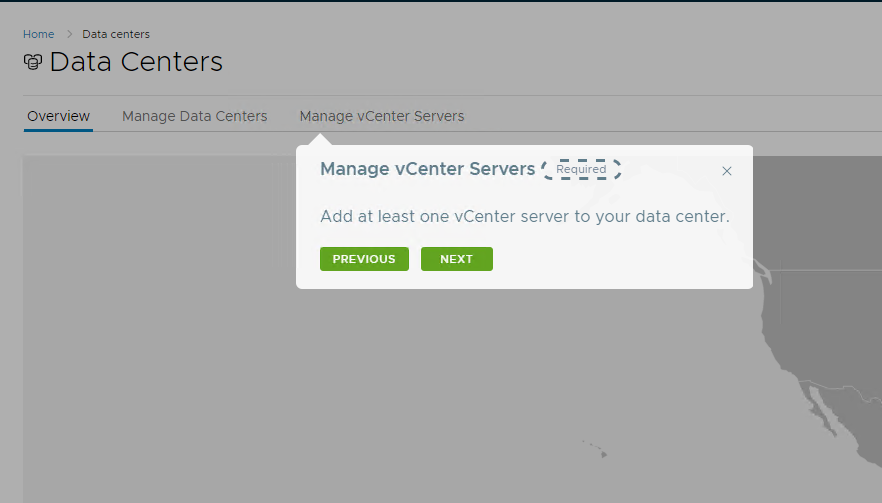
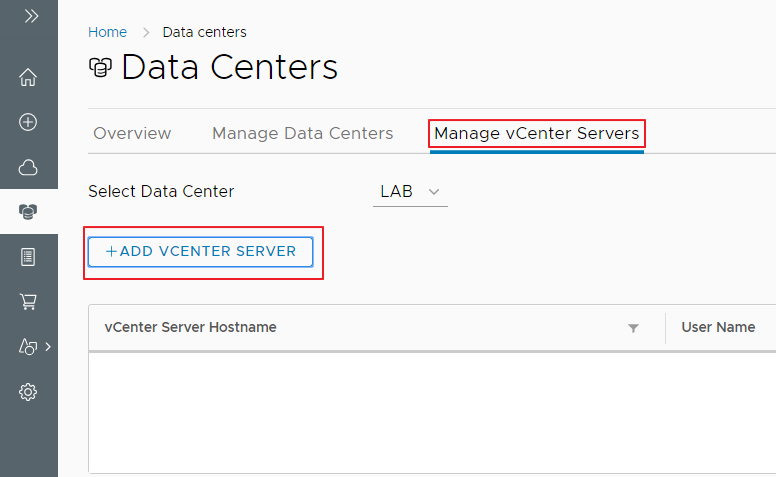
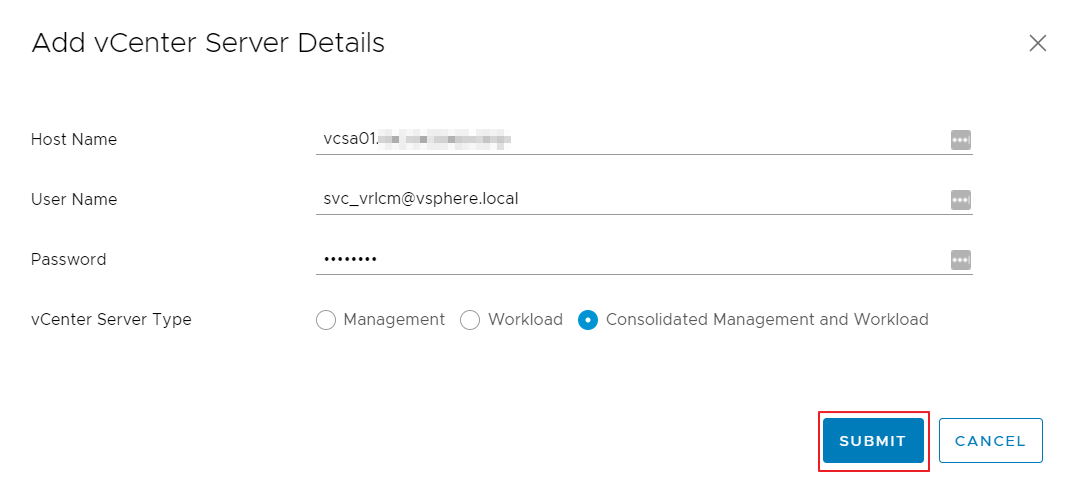
Next, we add the vCenter server
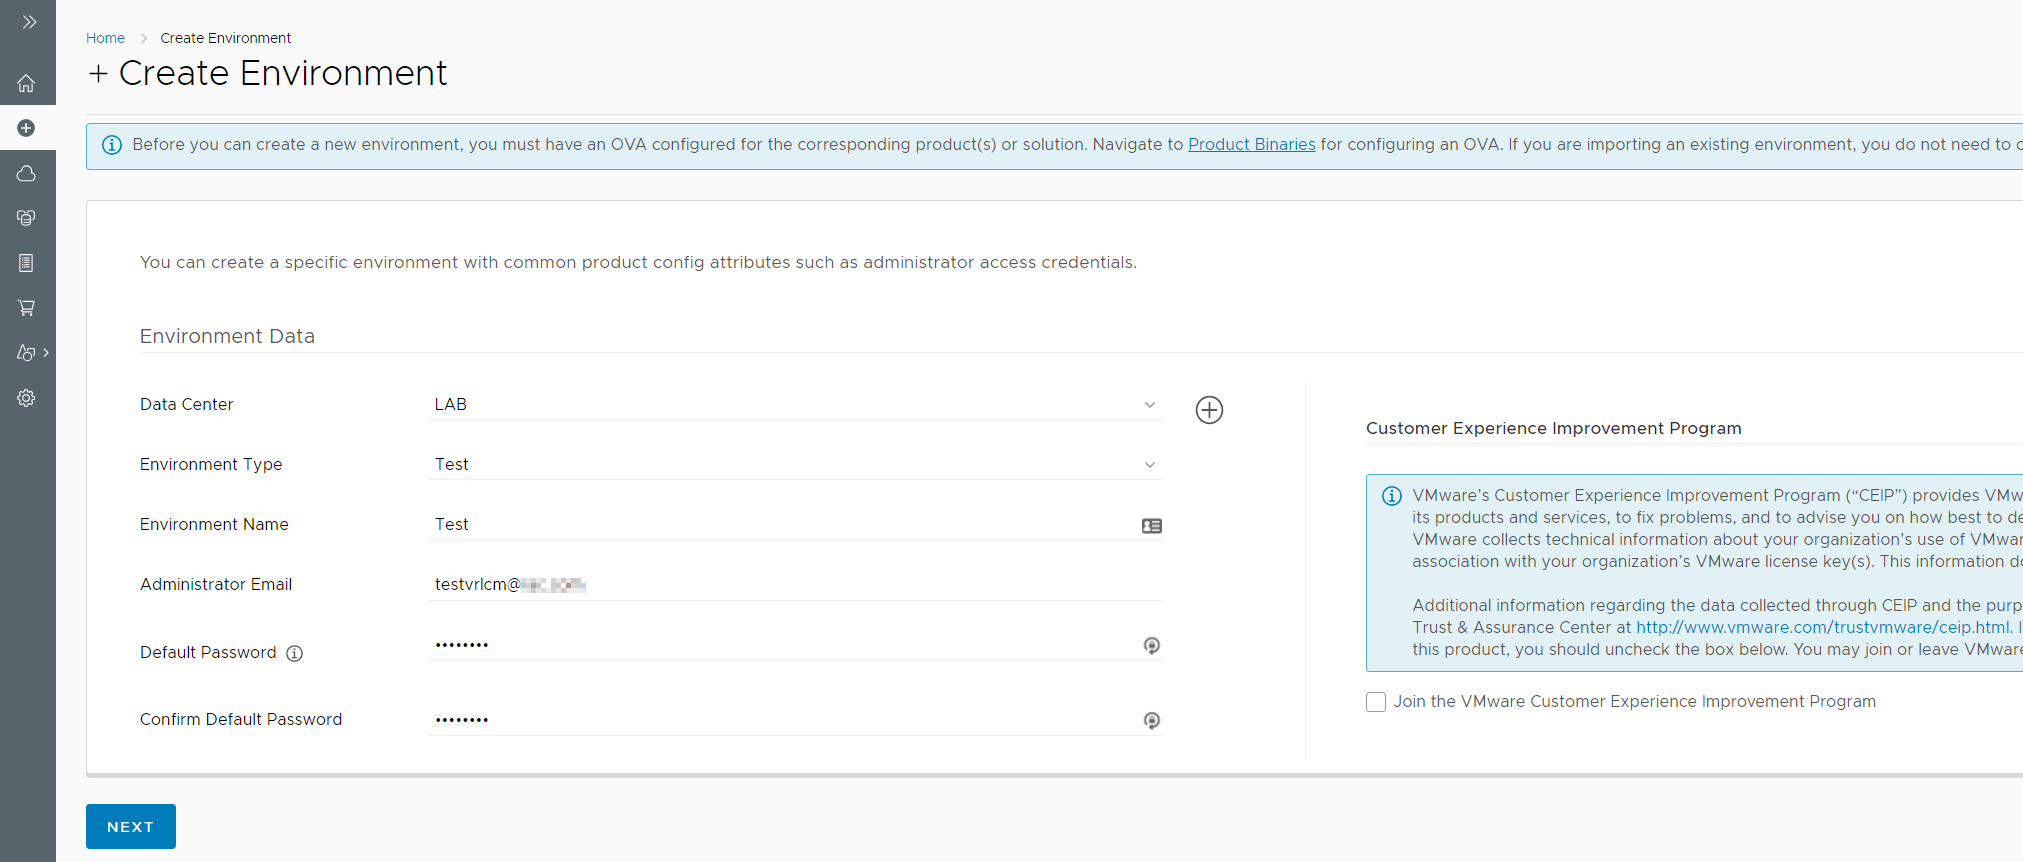
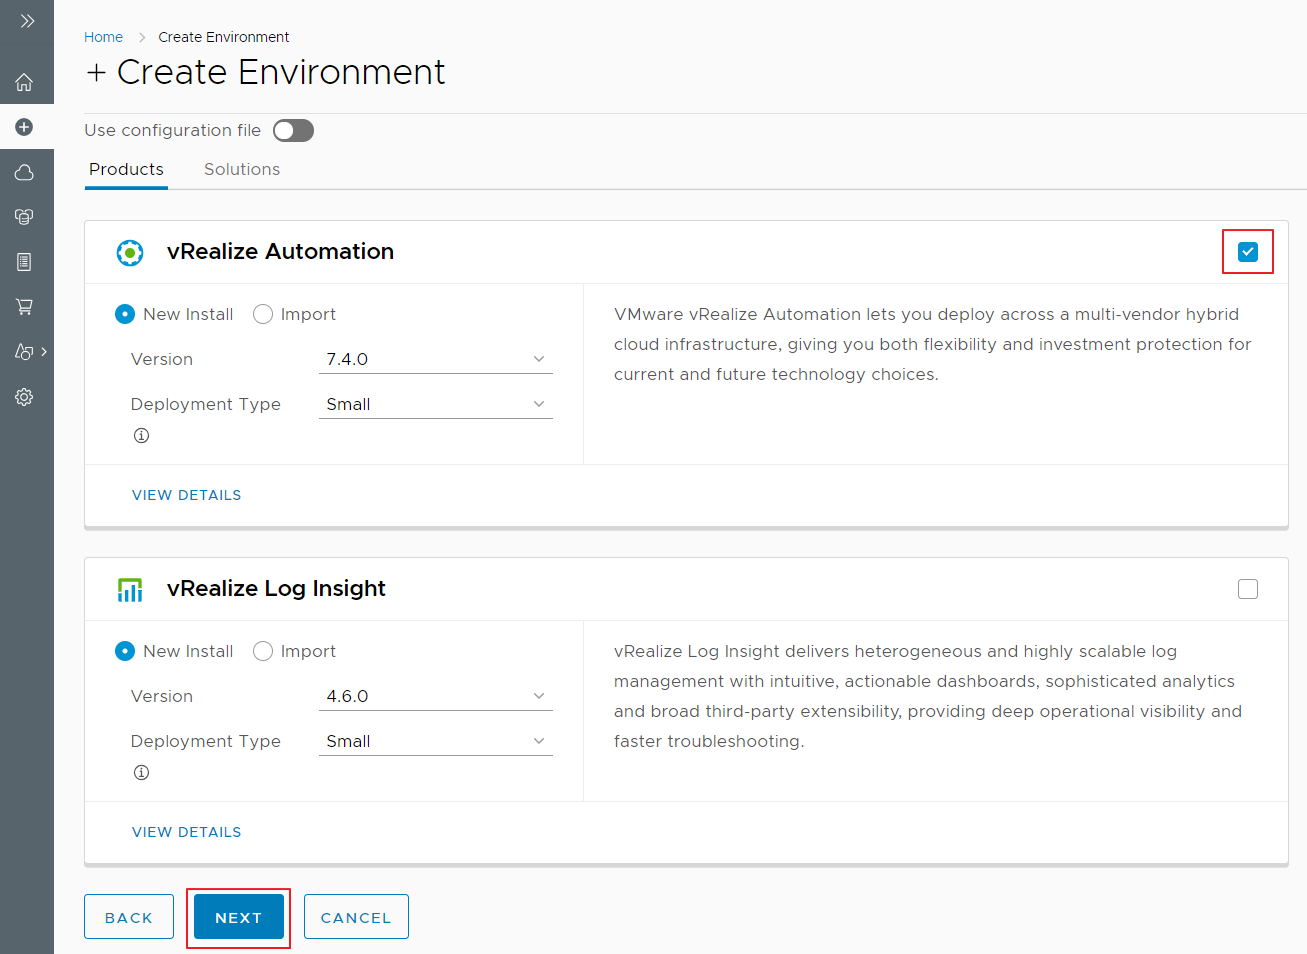
Now, Let us go ahead and create an Environment
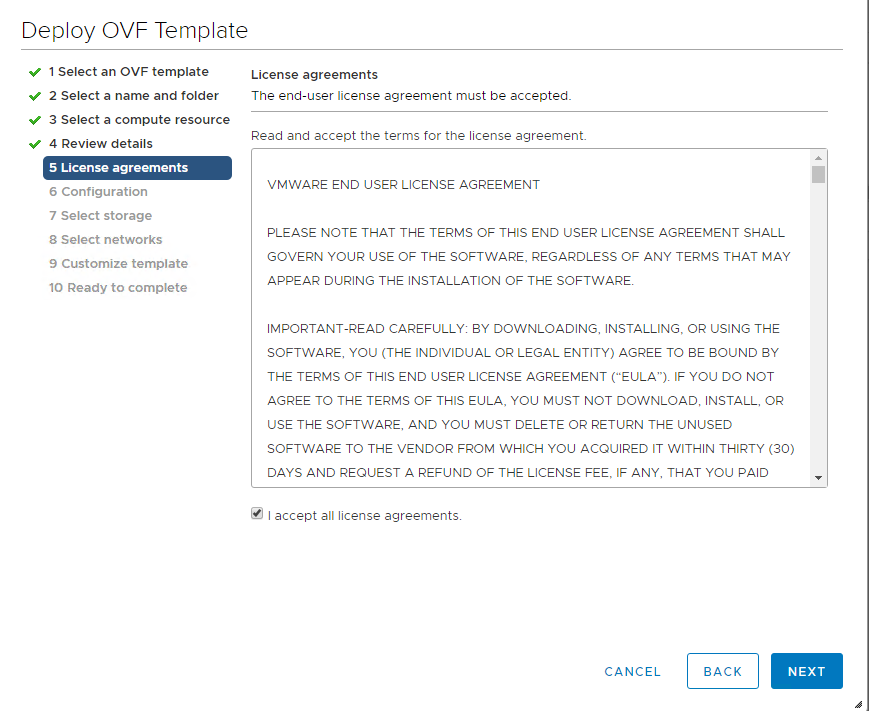
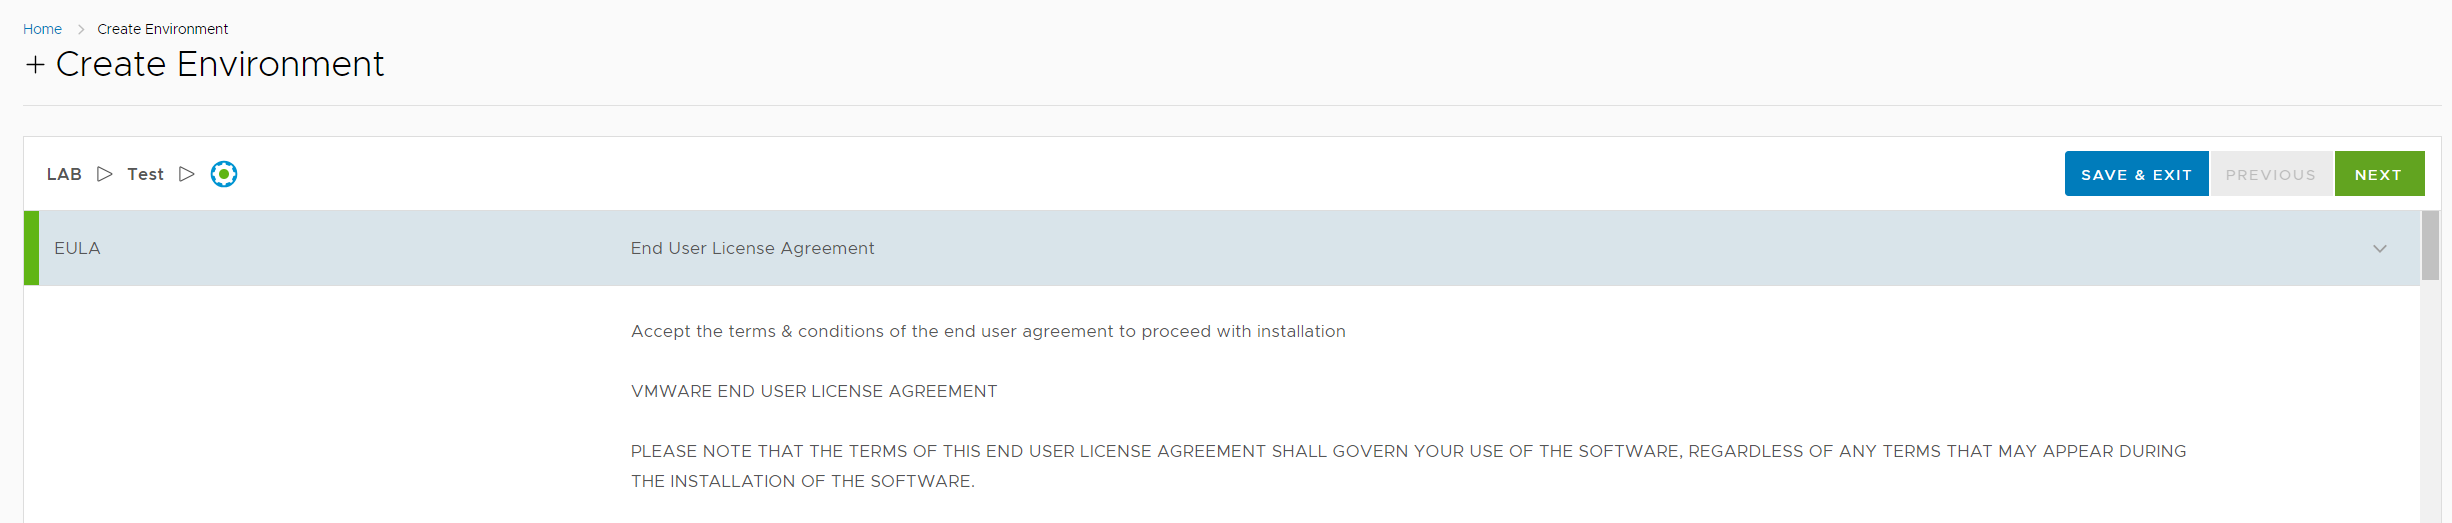
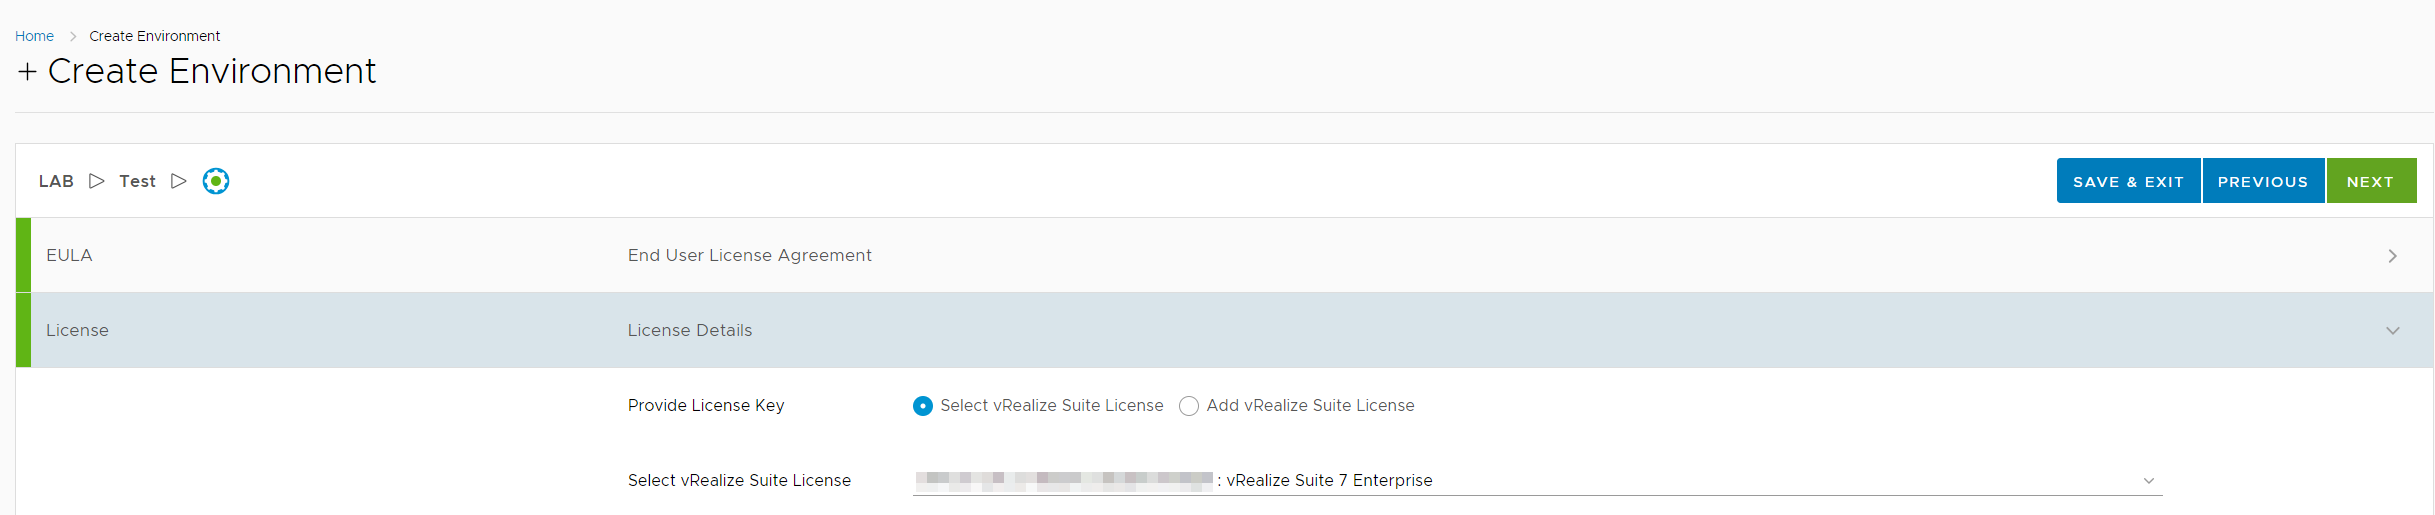
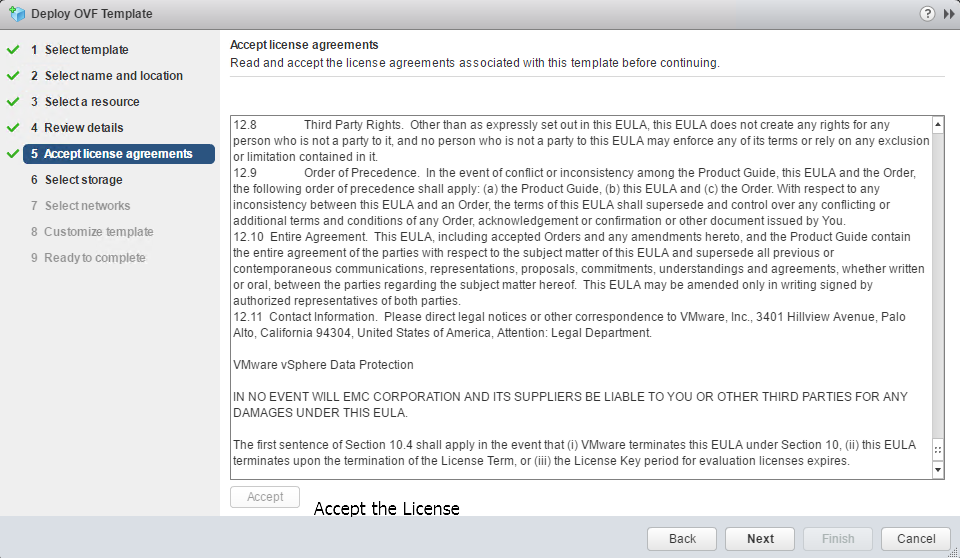
Accept the EULA Agreement by scrolling down, once you accept it, the NEXT button will appear
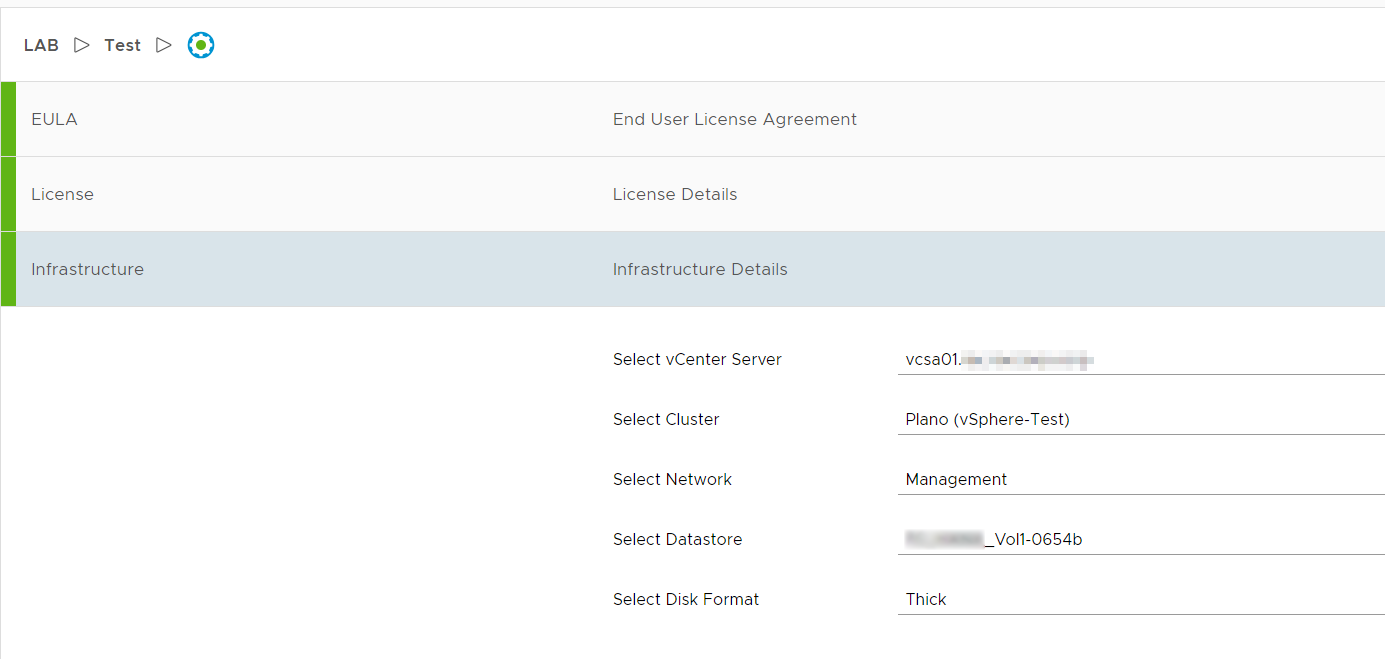
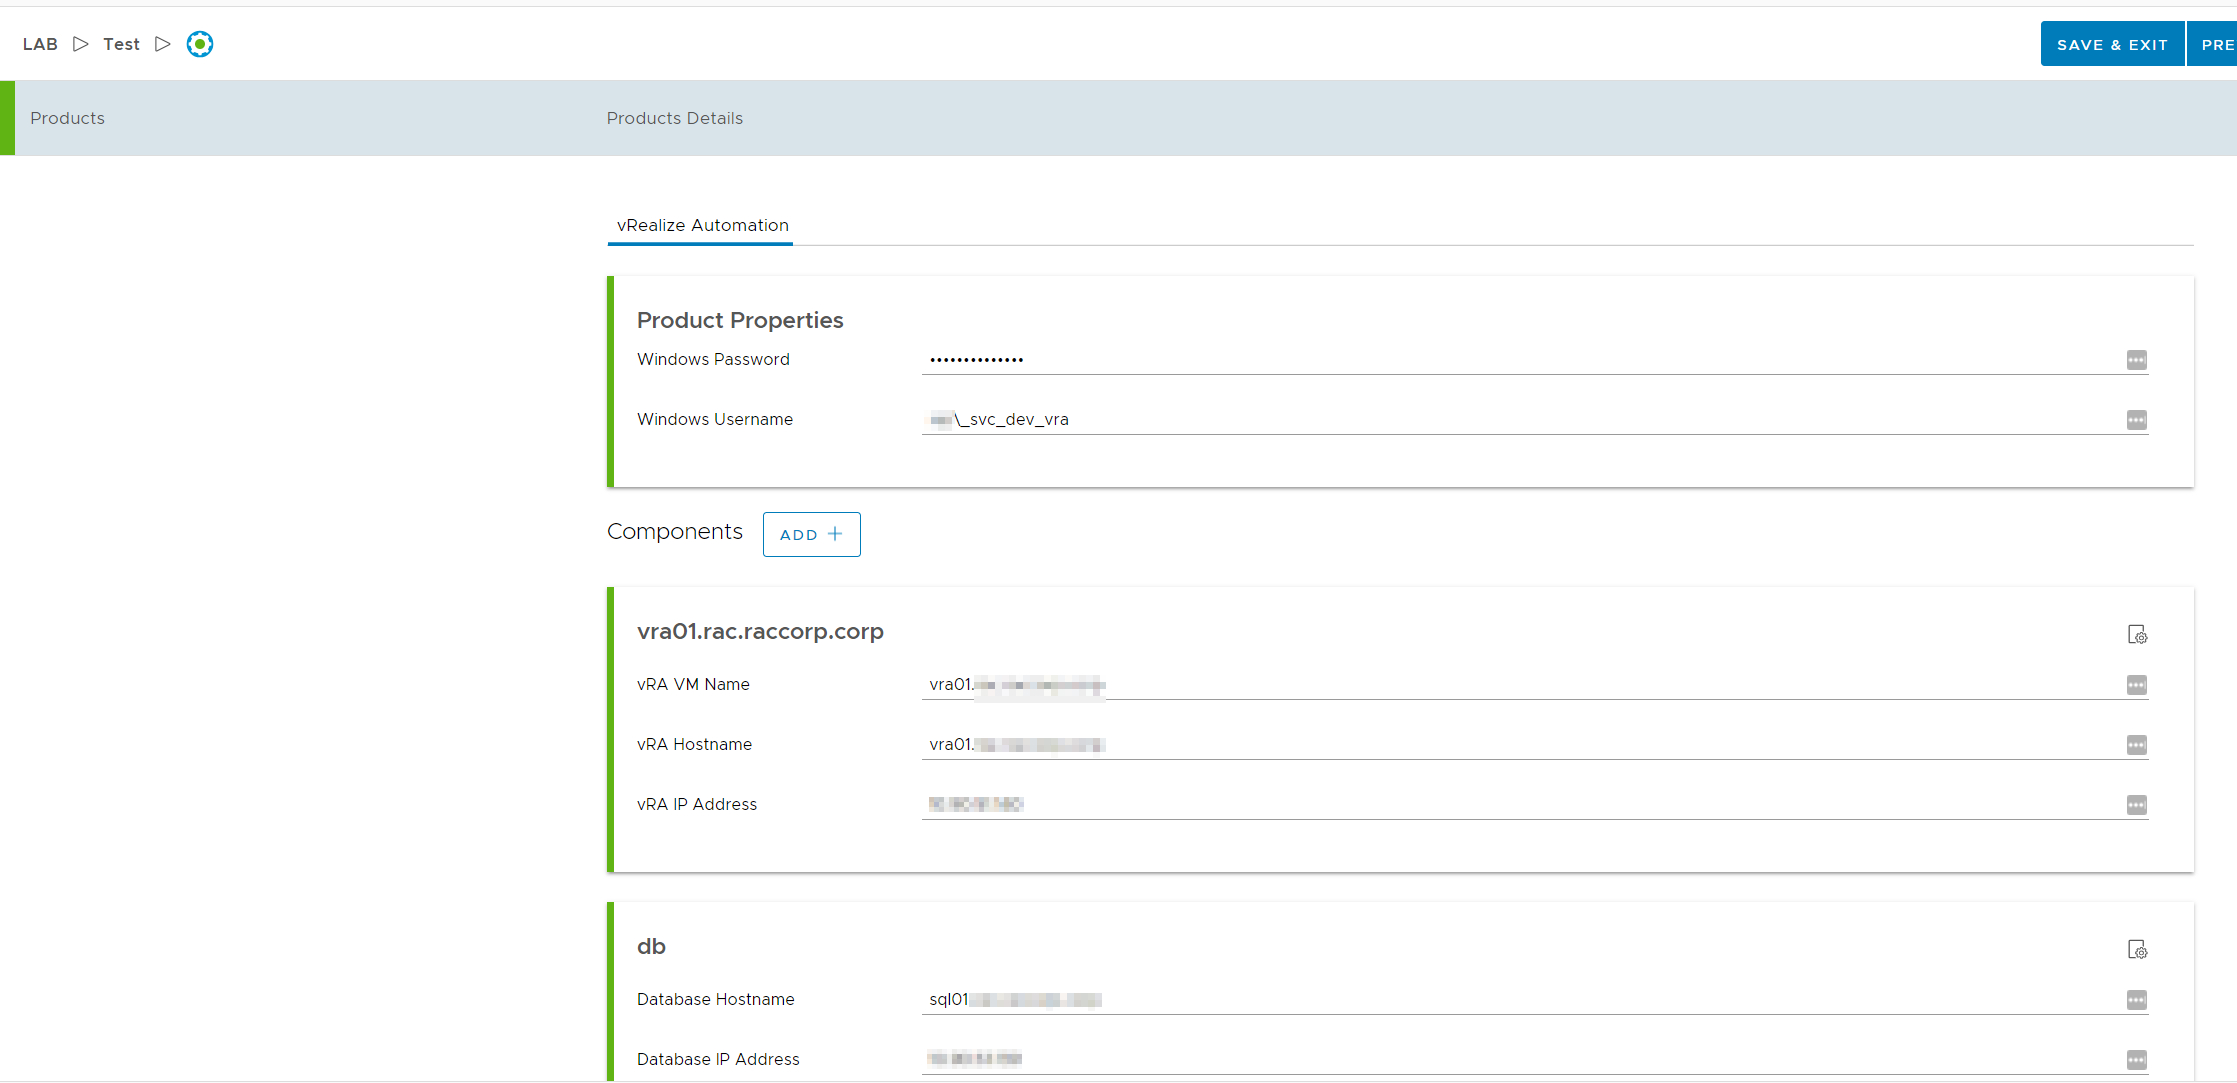
Provide all the required information. I have provided an existing SQL server and IAAS server, I have used 1 IAAS server for DEM Worker, Orchestrator, Proxy service
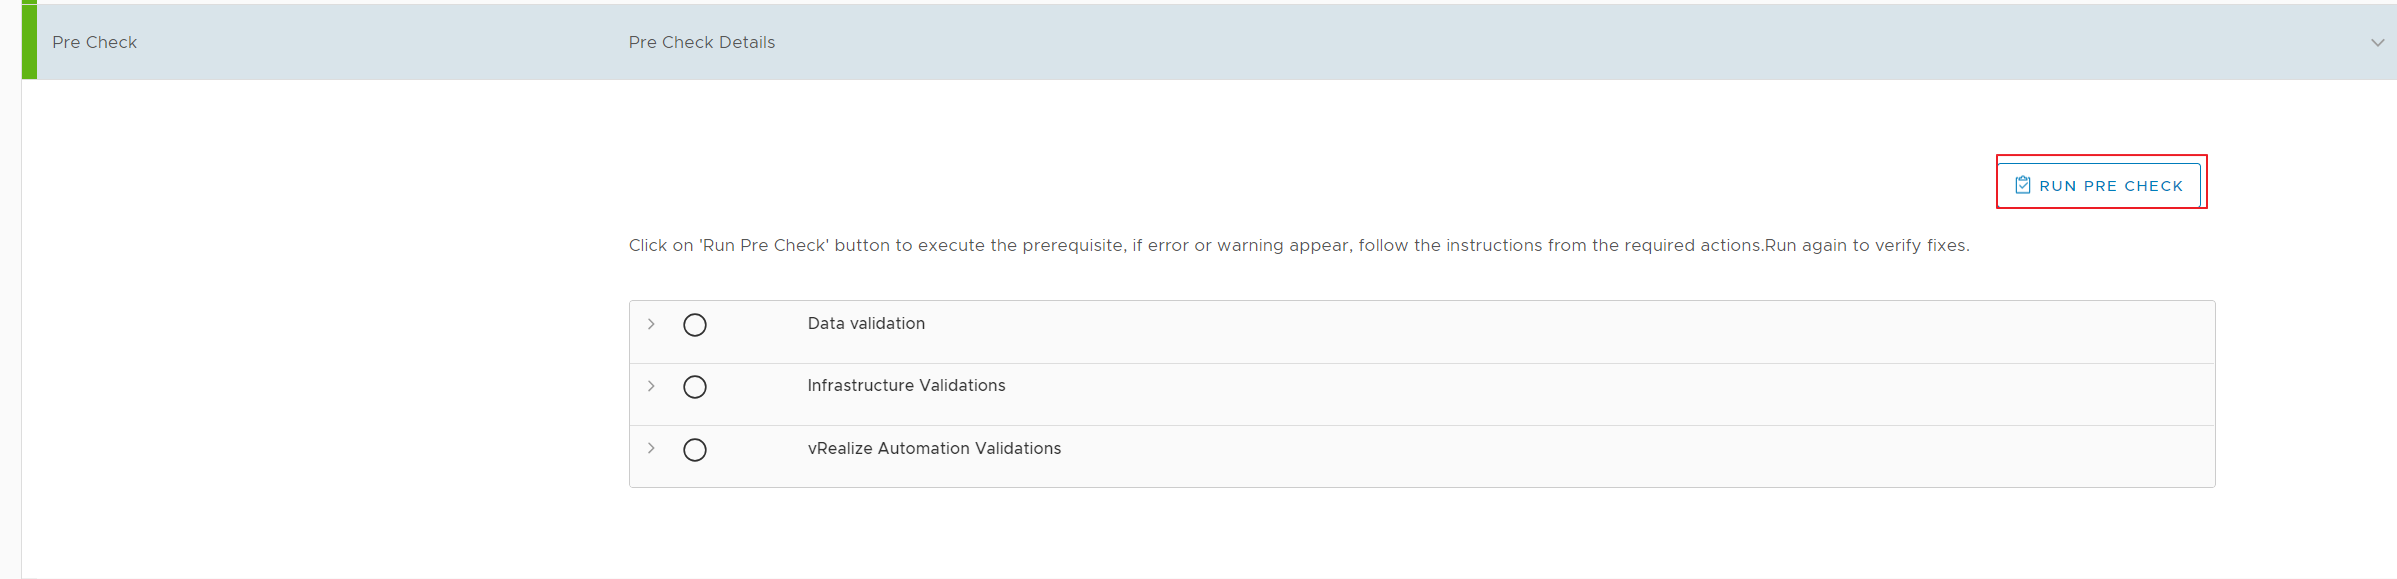
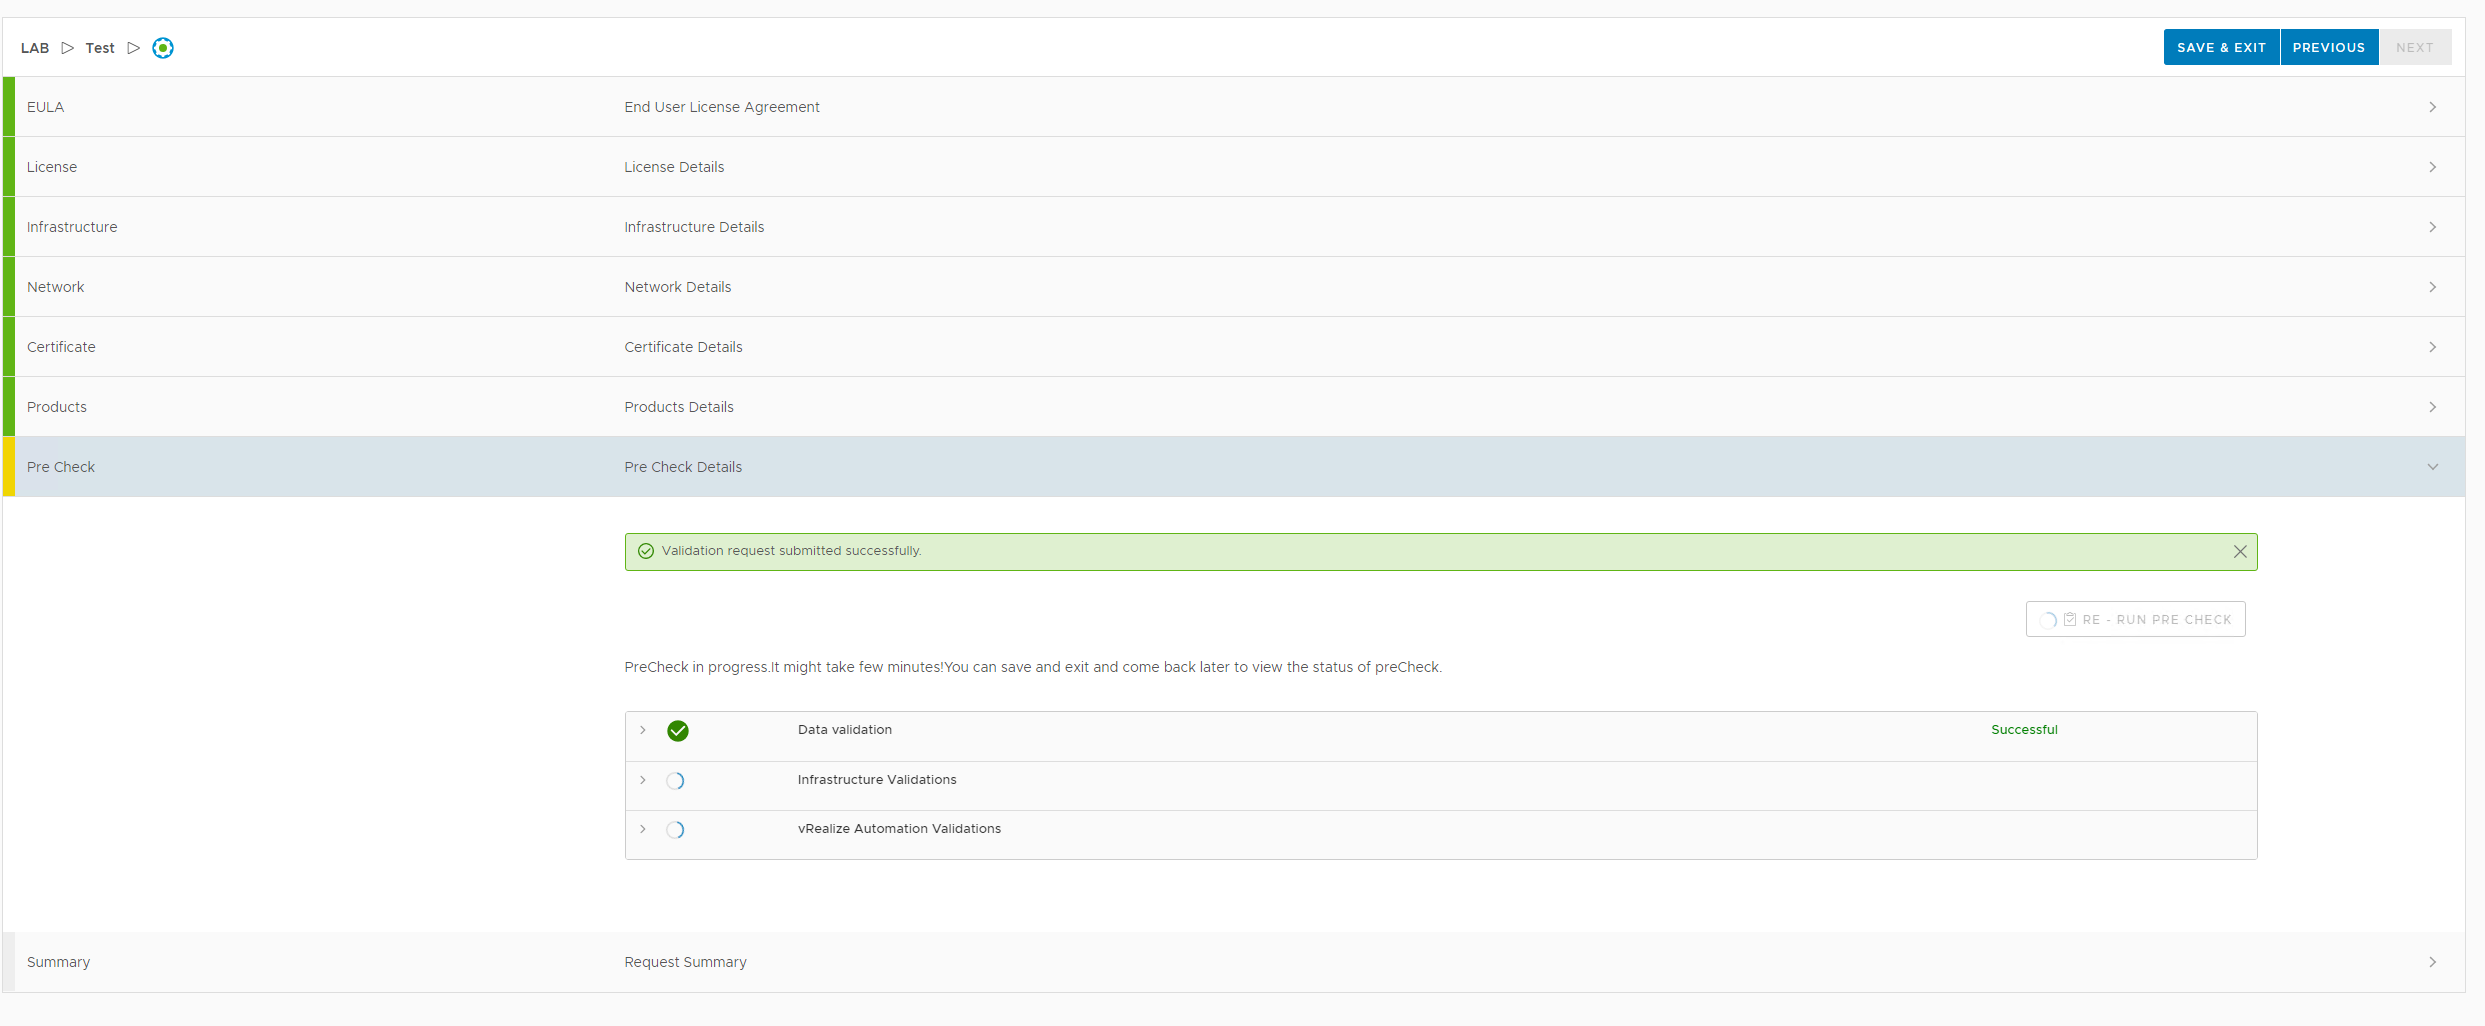
Click on RUN PRE CHECK option to perform the pre-checks before it deploys the environment
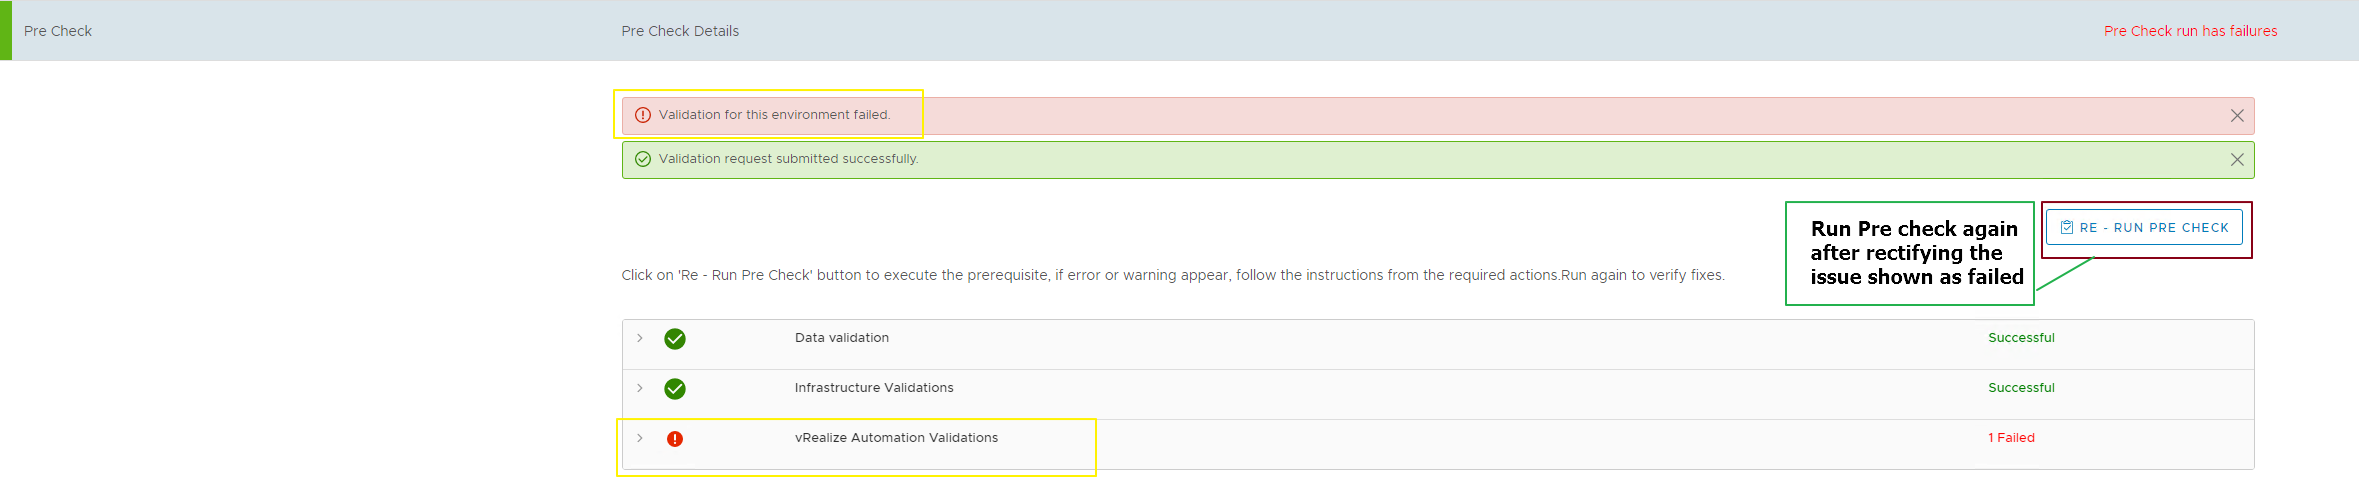
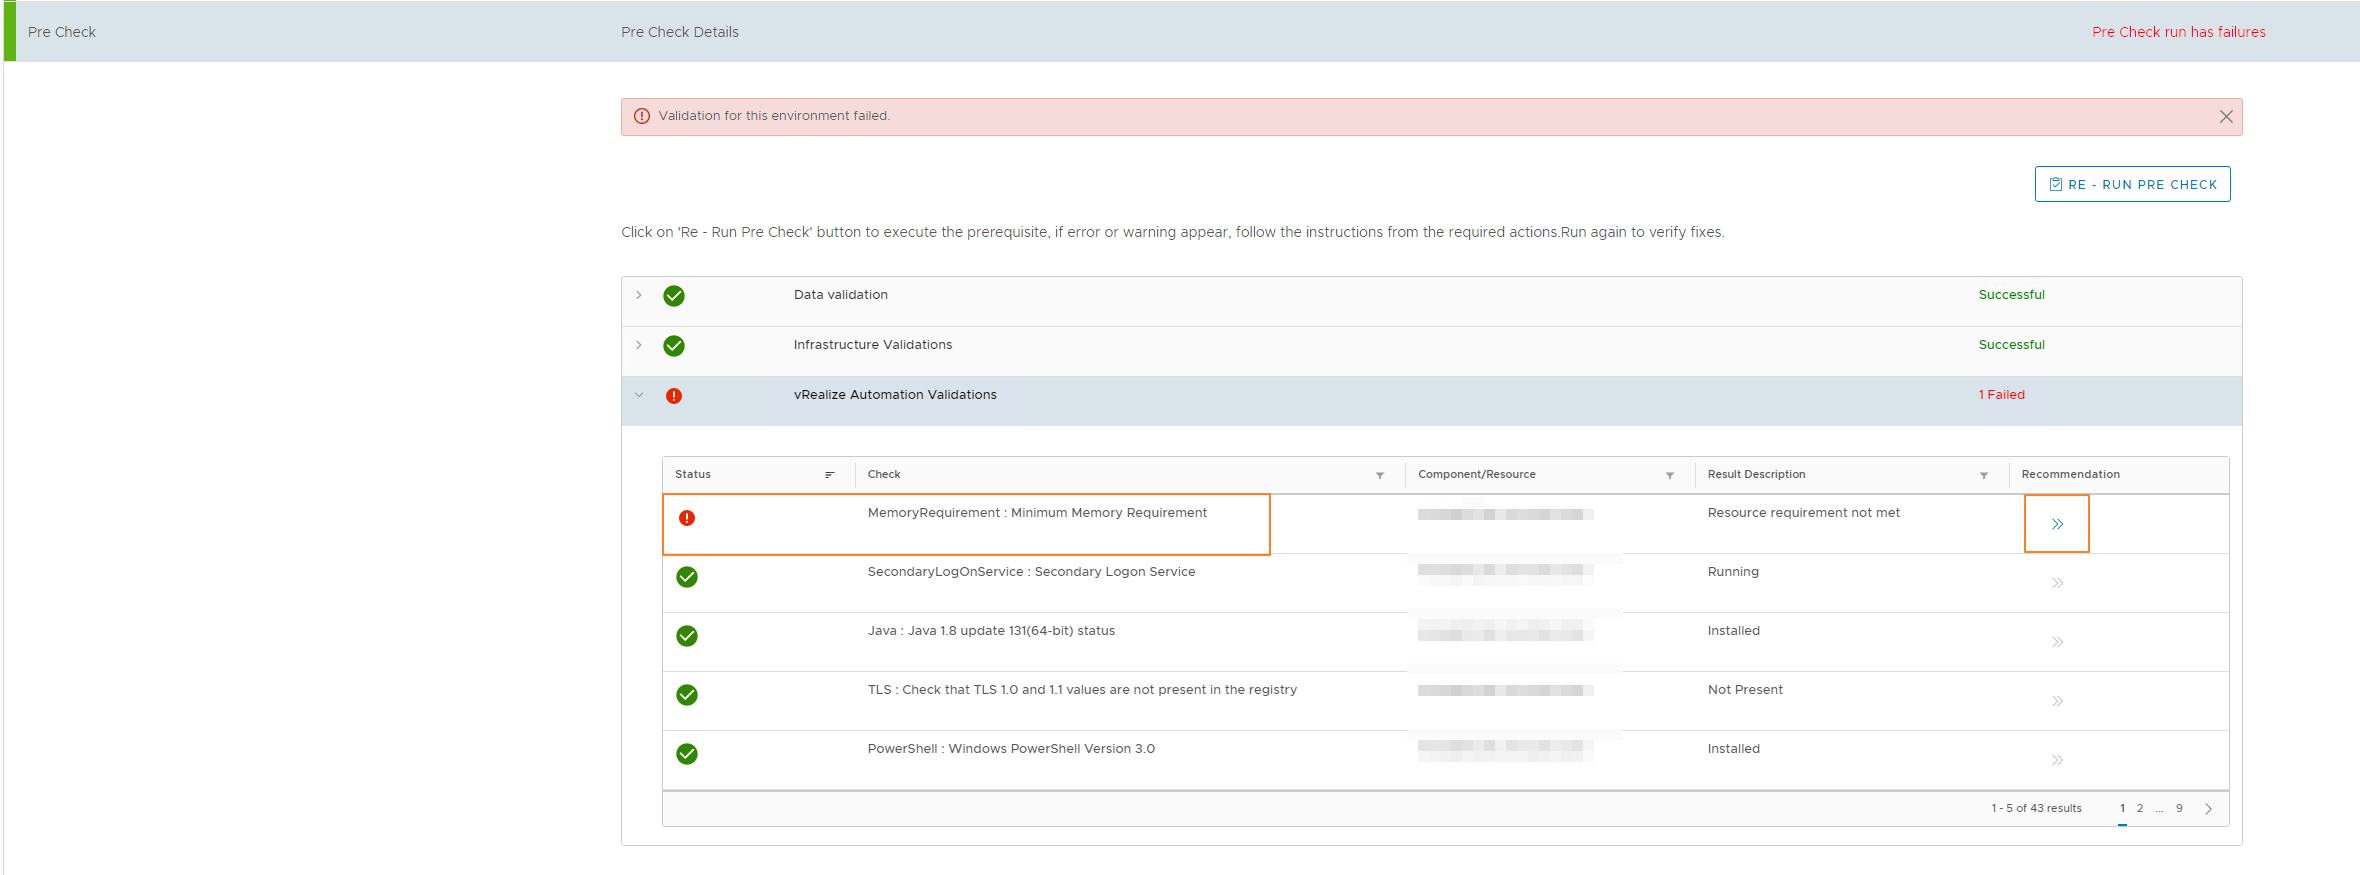
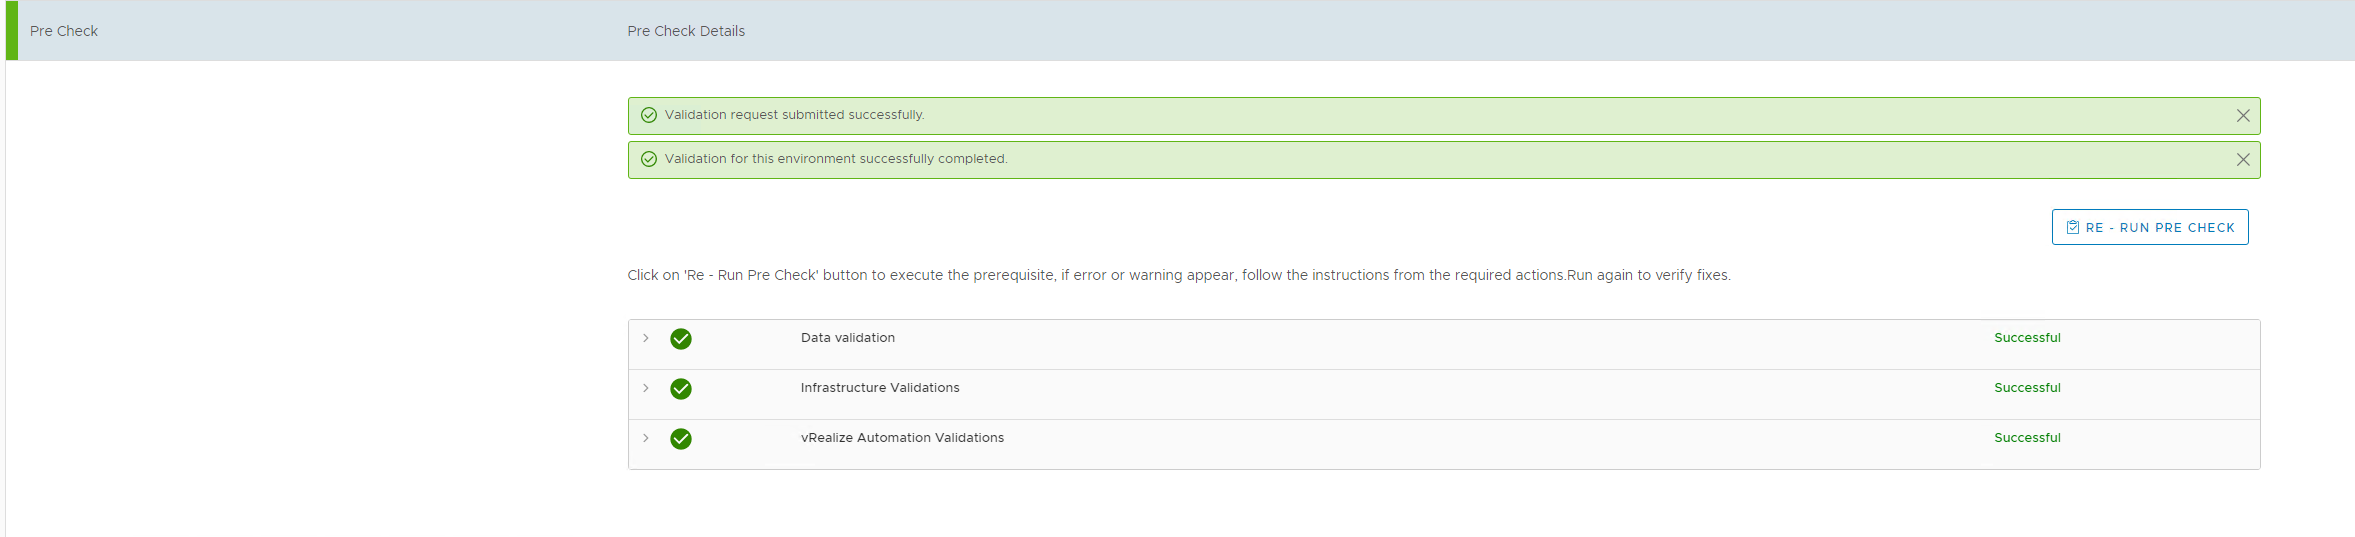
In this pre-check, you could get a validation failure which will need to be rectified before you run the pre-check again. its like shown in the picture below
Once you rectify the issue, run the pre-check again
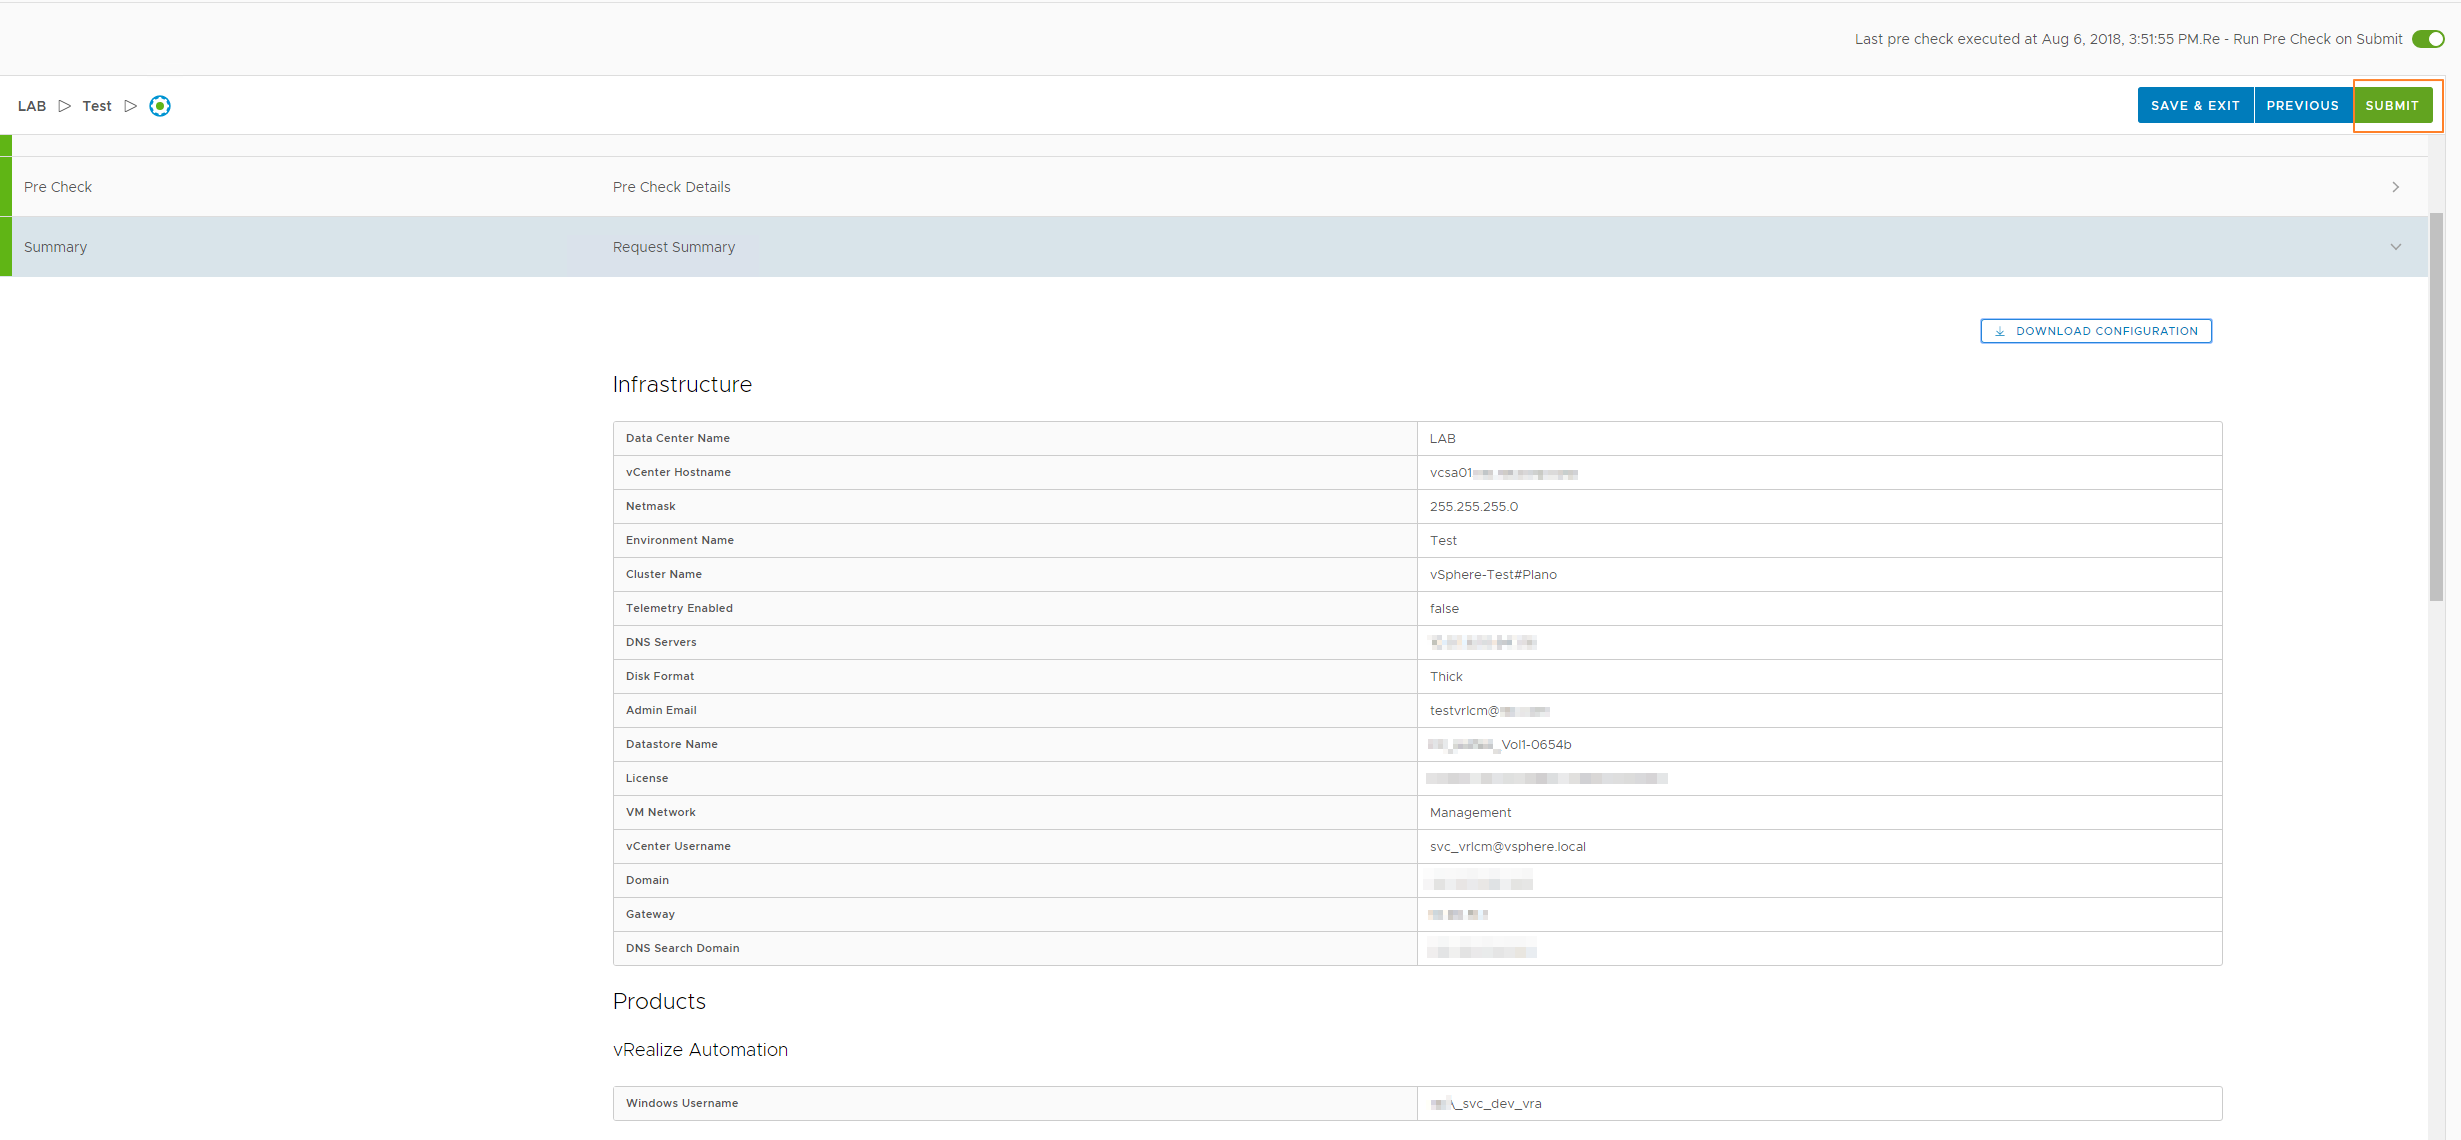
Once the pre-check comes back clean, click on Next to move ahead
Click Submit and the life cycle manager will do the rest.
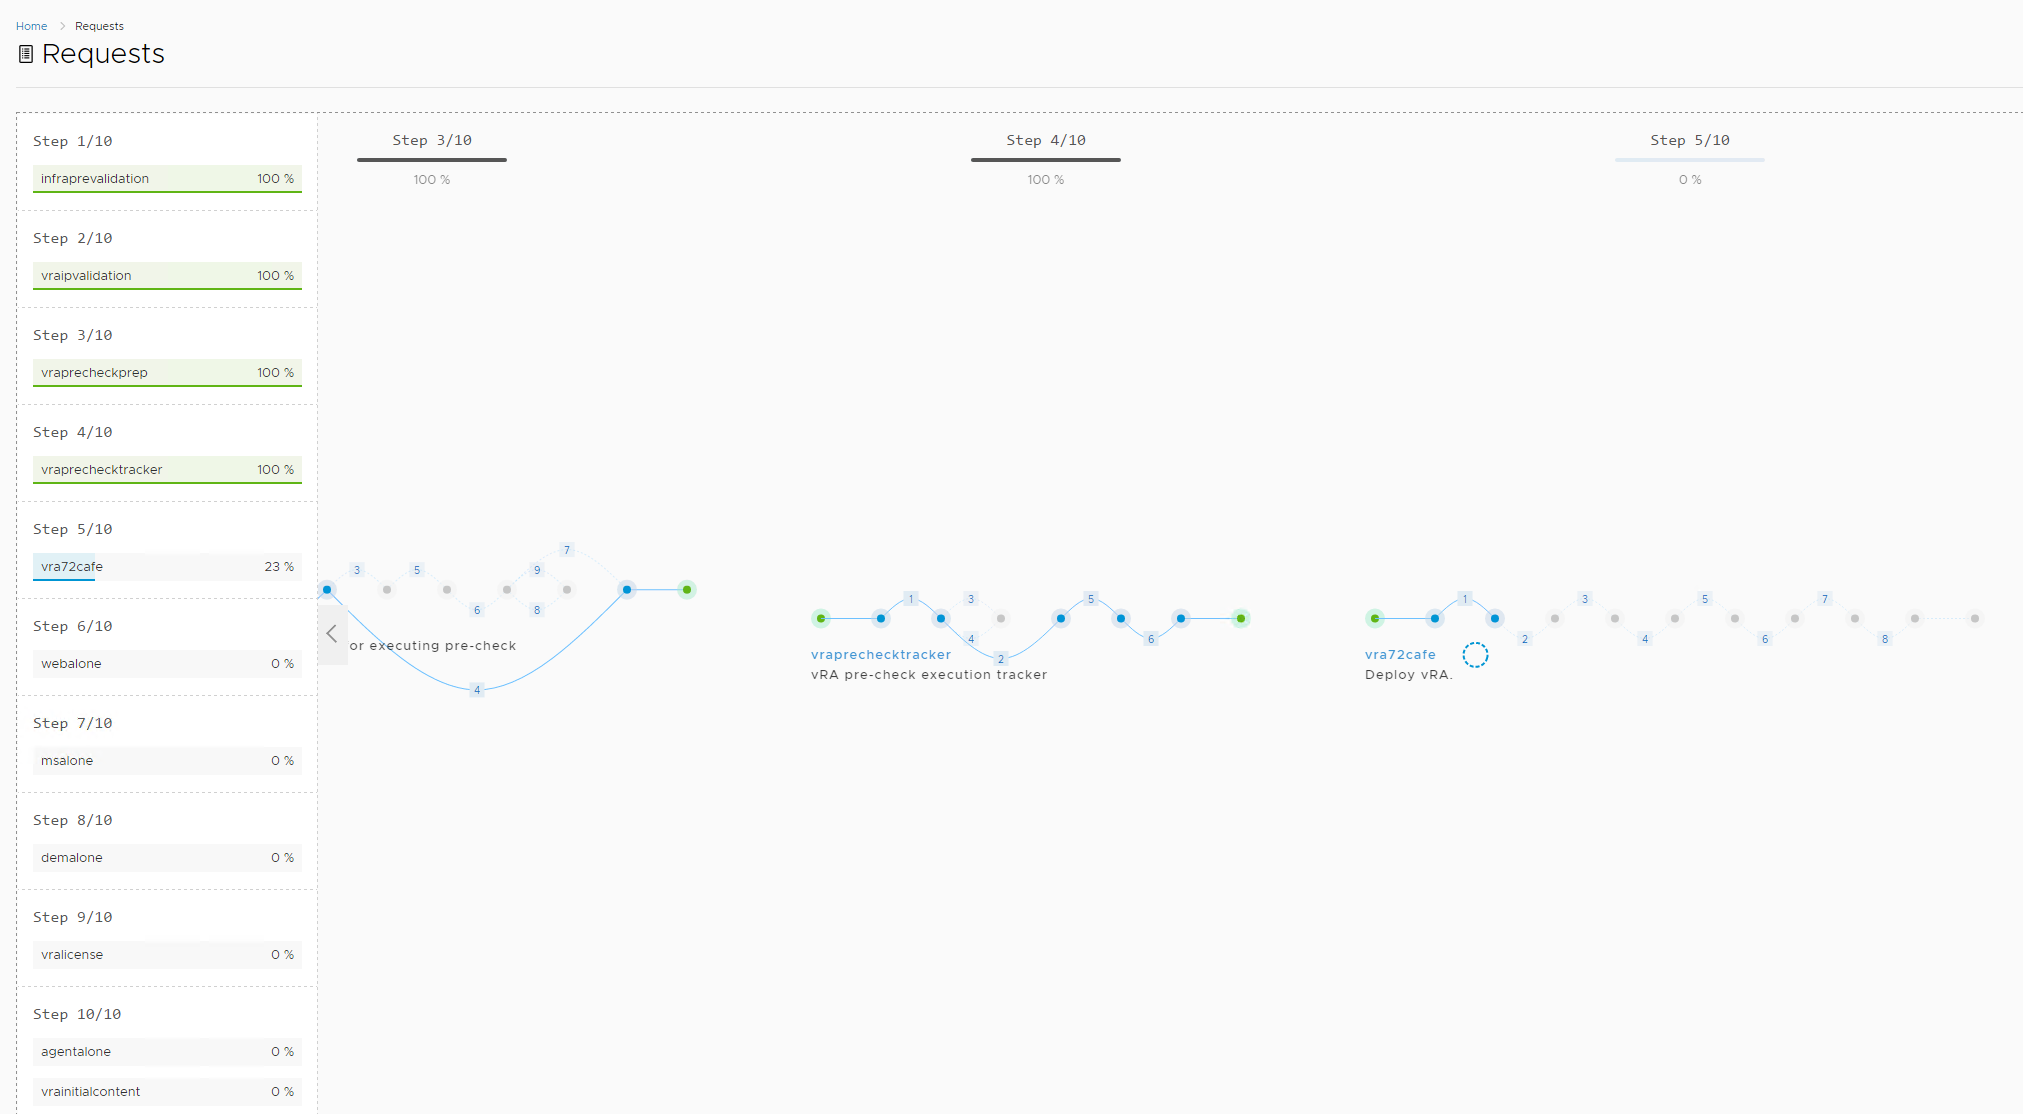
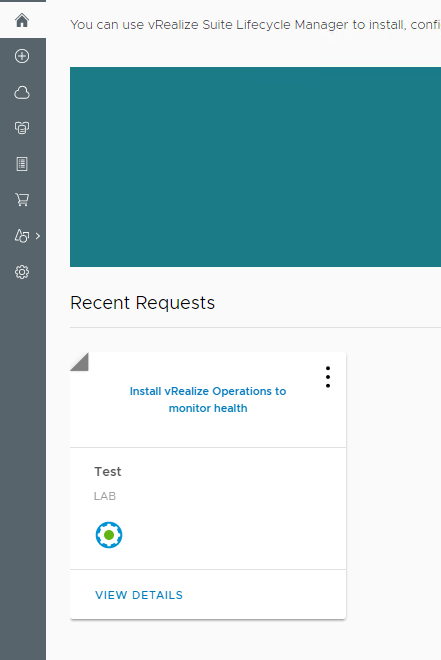
to check the progress, you can click on Requests icon on the left side of the page and clicking on in progress as the pic below
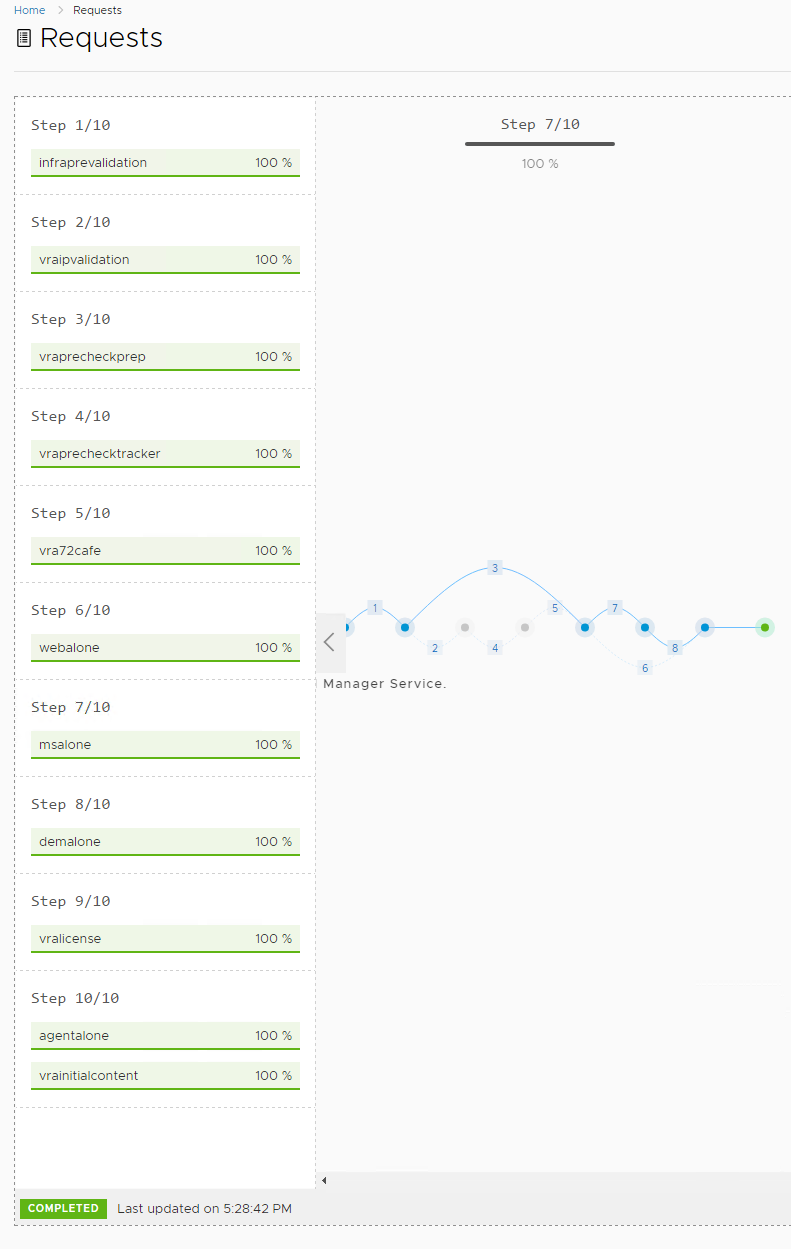
This process will take a long time … go, get some tea/coffee and it will still be deploying the environment …
This shows how to Install and configure vRealize Life Cycle Management and to create a vRA 7.4 environment.
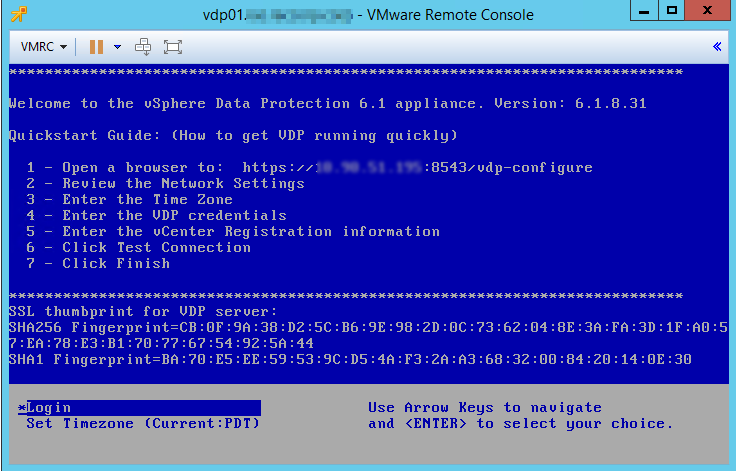
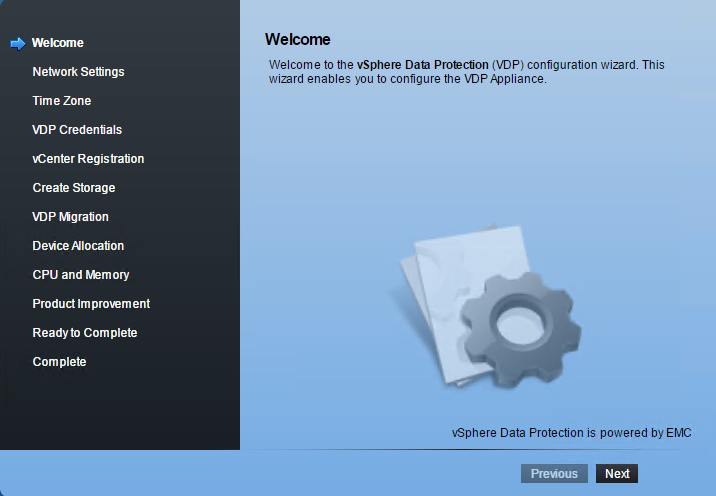
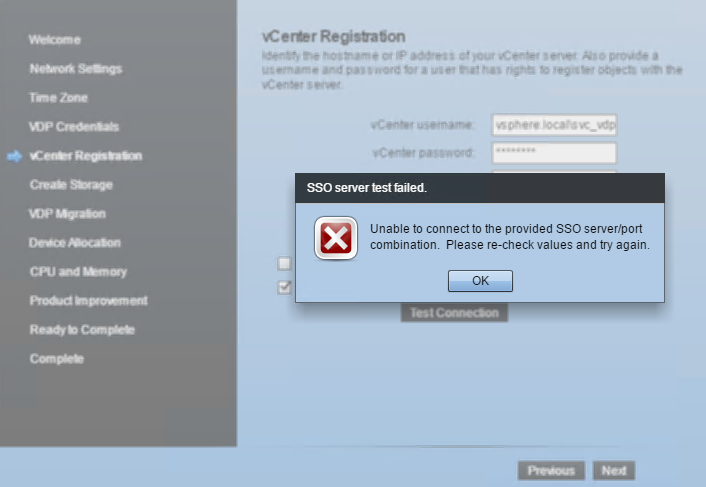
Recently, I came across an issue while configuring a new instance of VDP 6.1.8 appliance while performing vCenter Registration to the vCenter appliance 6.5 with an external Platform Services Controller.
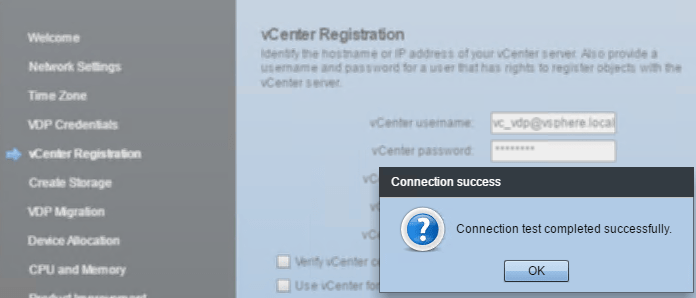
below is the error message I have been getting
I have provided the administrator account user credentials to the VCSA (vCenter server) with the default ports but still received the error.
Upon some deep troubleshooting, found out that the SSO server is the Platform Services Controller (PSC) since my environment had an external PSC and here is how you resolve this issue:
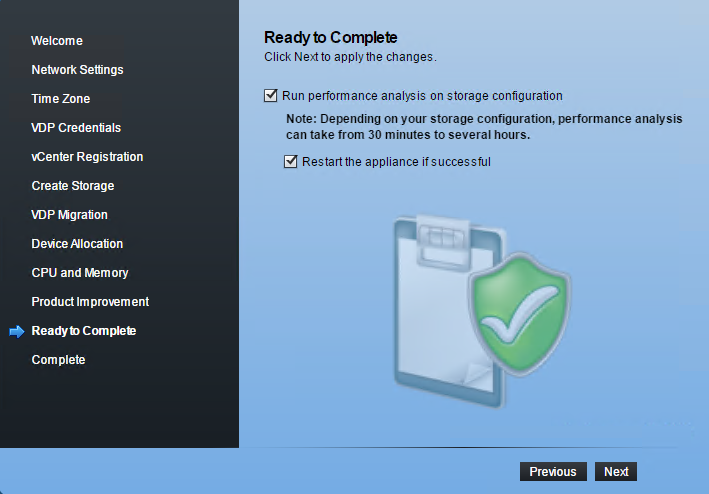
De-select the checkbox “Use vCenter for SSO authentication”, and add the Platform Services Controller hostname/IP in the new SSO entry line.
Now, you can test the connection and it will be a success
This is how the issue was resolved. Hope it helps someone out there.
This is with VDP version 6.1.8 connecting to VCSA 6.5 with External PSC
Looks like VMware finally got around to have a public statement on the release of vSphere 6.5 and here are some of its main NEW features
vCenter Server Appliance
vCenter server appliance now has integrated Update Manager
vCenter server appliance now has its native High Availability
vCenter server appliance has better appliance management
vCenter server appliance now has native Backup/Restore
HTML-5 based vSphere web client
Security
VM-level disk encryption capability designed to protect against unauthorized access to data. (This is done using the vSphere storage policy framework)
Encrypted vMotion capability
vSphere 6.5 adds a secure boot to the hypervisor to protect both the hypervisor and guest operating system
Enhanced audit-quality logging capability to provide more information about user actions like who did what, when and where if you need to investigate your environment
Host Resource management
Enhanced Host profiles (updated graphical editor that is part of the vSphere Web Client now has an easy-to-use search function in addition to a new ability to mark individual configuration elements as favorites for quick access, Administrators now have the means to create a hierarchy of host profiles by taking advantage of the new ability to copy settings from one profile to one or many others)
Auto Deploy (Easier to manage in vSphere 6.5 with the introduction of a full-featured graphical interface. Administrators no longer need to use PowerCLI to create and manage deploy rules or custom ESXi images)
Proactive HA ( Proactive HA will detect hardware conditions of a host and allow you to evacuate the VMs before the issue causes an outage. Working in conjunction with participating hardware vendors, vCenter will plug into the hardware monitoring solution to receive the health status of the monitored components such as fans, memory, and power supplies. vSphere can then be configured to respond according to the failure)
vSphere HA Orchestrated Restart (vSphere 6.5 now allows creating dependency chains using VM-to-VM rules. These dependency rules are enforced if when vSphere HA is used to restart VMs from failed hosts. This is great for multi-tier applications that do not recover successfully unless they are restarted in a particular order. A common example to this is a database, app, and web server)
Additional Restart priority levels in HA (vSphere 6.5 adds two additional restart priority levels named Highest and Lowest providing five total. This provides even greater control when planning the recovery of virtual machines managed by vSphere HA)
Simplified vSphere HA Admission Control ( First major change is that the administrator simply needs to define the number of host failures to tolerate (FTT). Once the numbers of hosts are configured, vSphere HA will automatically calculate a percentage of resources to set aside by applying the “Percentage of Cluster Resources” admission control policy. As hosts are added or removed from the cluster, the percentage will be automatically recalculated, Additionally, the vSphere Web Client will issue a warning if vSphere HA detects a host failure would cause a reduction in VM performance based on the actual resource consumption, not only based on the configured reservations)
Fault Tolerance (FT) (vSphere 6.5 FT has more integration with DRS which will help make better placement decisions by ranking the hosts based on the available network bandwidth as well as recommending which datastore to place the secondary vmdk files, FT networks can now be configured to use multiple NICs to increase the overall bandwidth available for FT logging traffic)
DRS Advanced options (VM Distribution, Memory Metric for Load Balancing, CPU over-commitment have their own check boxes in DRS)
Network-Aware DRS (DRS now considers network utilization, DRS observes the Tx and Rx rates of the connected physical uplinks and avoids placing VMs on hosts that are greater than 80% utilized. DRS will not reactively balance the hosts solely based on network utilization, rather, it will use network utilization as an additional check to determine whether the currently selected host is suitable for the VM)
These are some of the main improvements in vSphere 6.5.